It's easy to start using your Converso account.
Nobody likes reading a long user guide! So this article is designed to give Admins (rather than Agents) a quick guide on how to set up your account ready for your team to start messaging your contacts. It should take around 5 minutes (ish) to read.
Please read the other articles in the Converso knowledge base for more in depth descriptions of features and how to use your account.
There's also a checklist of items here.
1. Take the tour
Firstly, go to the flag icon in the top right of your screen to start the product tour, which will give you a good overview on where key features are, and how to use them:

2. Set up your business
Under Settings > Business, add your business details eg name, address, and logo - these will be included in any invoices and checkouts you create. The logo can also be added to WhatsApp message templates that you create .
Below business details, you will find the payments URL - this is the web address that is used for your payment links. This should be pre-provisioned as https://customer.converso.io/
(You will in future be able to connect your own domain so the URL includes your own business name, eg payments.yourcompany.com).
You can also set whether details for any invoices you send are obfuscated, such as the customer details (name and address) or invoice details (product description):
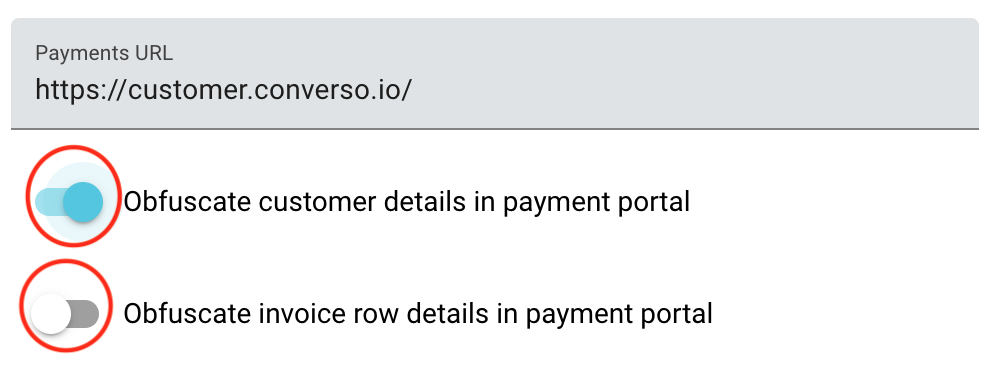
This is useful if customer or client data, or product info, contained within an invoice is considered confidential eg for medical or patient invoicing.
3. Add users
An admin can add colleagues as new users by going to Settings > Users. Click on the Add user button and add the new user's details.
The new user will then receive an email with their login details (email as username, and a new password). They can then change their password when they first login.
Users are provisioned at two levels: Agent or Admin.
Admin has access to all functionality across all groups (there is presently no admin role for just a group). You can create multiple Admin users.
Agents are more restricted in use - they can't access Settings, can't delete contacts, conversations or invoices, and can't edit any inputs in group admin. They also have no visibility of Message templates (under Group admin).
Agents can though assign a conversation to themselves or another agent. They can also archive a conversation as long as the conversation was assigned to them.
When a new user is added, they are automatically included as a member in the first group.
4. Add tags
Under Settings > Tags, you can create tags to apply to contacts.
To create a tag, just add the name and click Add tag.
These can be added to contacts under the tags dropdown:
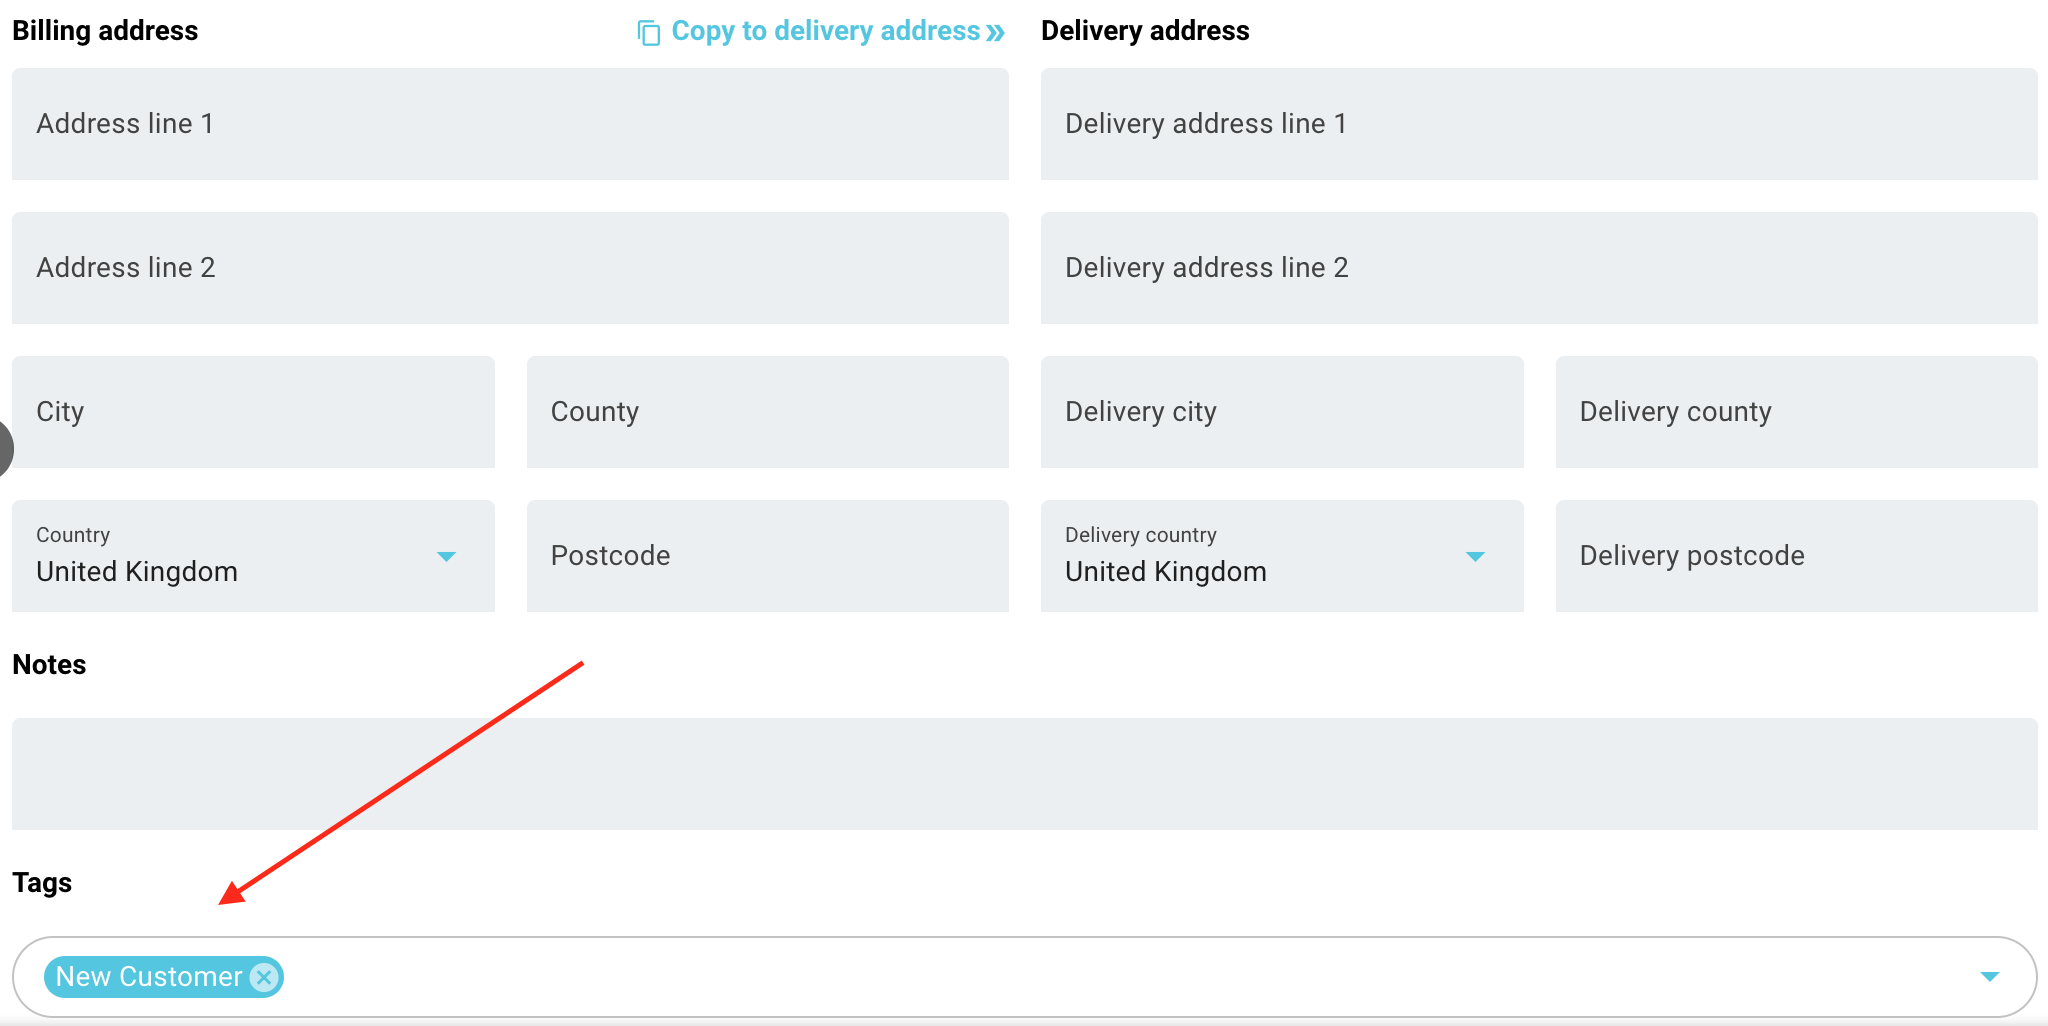
Once a tag has been created, it will be possible to send messages to groups defined by the tag (this feature is presently under development).
5. Create a group
A group consists of a team inbox, with defined users (or members) who can view and respond to messages delivered to that inbox.
The inbox can be connected to a WhatsApp and/or SMS number.
(A Converso group should not to be confused with a WhatsApp group, they are different concepts).
All accounts have a default General group.
If you're an admin, you can also create new groups.
A group also consists of a my inbox, archived messages, broadcast messages, payments and admin. Conversations can be assigned to one or more users in a group.
Under Admin > Channels, if you are an admin, you can connect the group team inbox to WhatsApp. For adding an SMS number, please contact support@converso.io.
Agents can only view the channels that have been connected, and the relevant text and WhatsApp numbers for the group, but can not connect or make any changes.
Under Admin> Team, admins can select which users in the business can view and send messages in the group:

A user can be a member of one or more groups.
Under Admin, you can also set up your Auto Responder - more details on that can be found here.
6. Import contacts
You can import your contacts via CSV - just go to contacts and click on Import Contacts and follow the instructions. For more details, please see the article here.
If you already have contacts saved under contacts, any new import will look for mobile number and then email, and if there is a match, the existing saved record will remain, with updates applied where appropriate from the imported data.
You can also import contacts from Xero and Quickbooks (see below).
7. Connect to WhatsApp
To connect to WhatsApp, please go to Settings > Integrations, and click on Connect to WhatsApp to get connected.
Please read this article here for more details.
Some key steps to remember as part of your WhatsApp set up:
Remember to save your business logo as part of your profile on your 360dialog account, or on your WhatsApp Business Account. This will then appear on the top of all of your customer conversations on your customer's device.
Also, create your message templates at your 360dialog client hub (who provide access to the WhatsApp Business API). This is located at app.360dialog.io.
Message templates will then be able to initiate new outbound conversations with clients - you can find out more info on how to create templates here.
8. Send out notifications to your customers
Once you get set up with WhatsApp, it's important to let your contacts know about your new messaging service, and how they can contact you.
This can be done in a variety of ways:
> send an email to your contact base letting them know of your new WhatsApp number, and that it can be used for support and sales enquiries
> Embed a WhatsApp icon and number in your email signature
> Send a broadcast SMS message to your contacts, personalised with their name. This can be done by going to Broadcast, and selecting SMS and choosing the New Contacts tag. This will send a predefined welcome message to all new Contacts, asking for Opt-in.
By letting your contacts know about your new WhatsApp message service, you are setting their expectations around receiving WhatsApp messages. Also, it is important to first collect consent from the customer in order to be able to send outbound messages.
9. Update your Contact Us page
You can embed a WhatsApp click to chat button on your Contact Us webpage:

You can also embed the same link behind a contact number, or use a QR code:
![]()

This makes it easy for browsers to connect with your support team from your website, and the QR code enables you to enable connection from a printed document, such as an invoice, or a marketing flyer.
For more details, please see the article here.
Sending out payment requests (eg invoices and checkouts)? Then you'll need to follow these quick steps:
10. Add payment providers
Invoices and checkouts can be created in Converso, or imported from Xero or Quickbooks. You can add payment buttons to your invoices and checkouts by connecting with Stripe for card payments, or connecting with Crezco for Open Banking payments.
Just go to Settings > Payments to get connected.
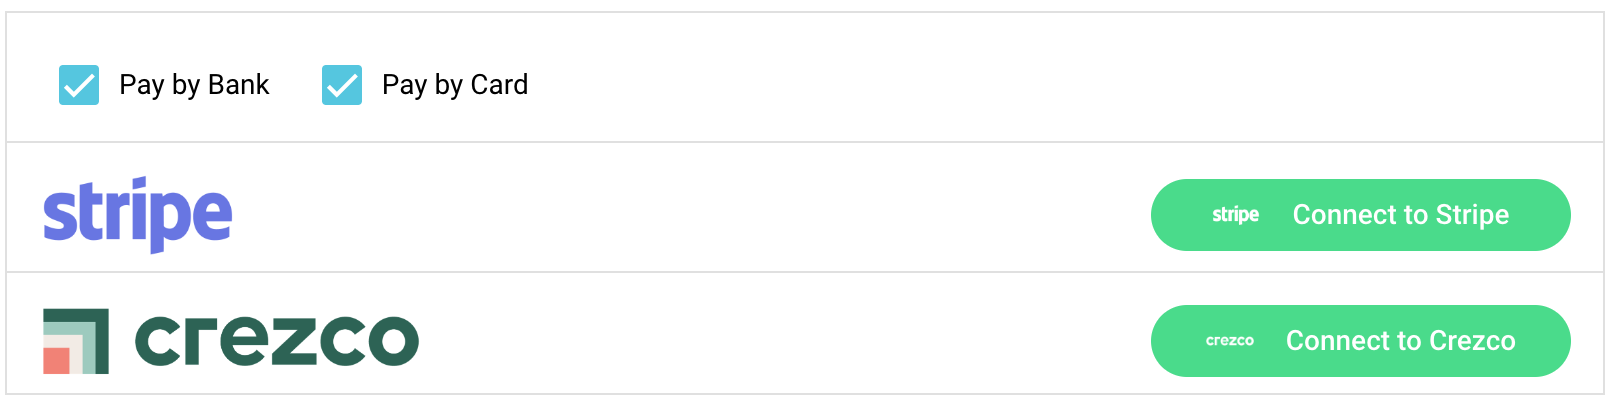
If you don't have an account with either of these providers, just follow the relevant link and sign up - it only takes a couple of minutes.
You can also define what payment methods are presented to contacts by ticking the relevant box(es) eg Pay by Bank for bank payments via Crezco, and Pay by Card for card payments via Stripe.
If the end customer has Apple Pay or Google Pay configured, these will automatically appear as options for card payment.
10. Connect your accounting apps
You can connect with Xero and Quickbooks in order to import invoices and send them by text (WhatsApp coming soon).
Go to Settings > Integrations and click on the relevant provider.
 Connecting takes a few seconds, and then new invoices, when saved, will be imported automatically into Converso.
For Xero, you will have options to define which accounts should be updated for bank and card payments:
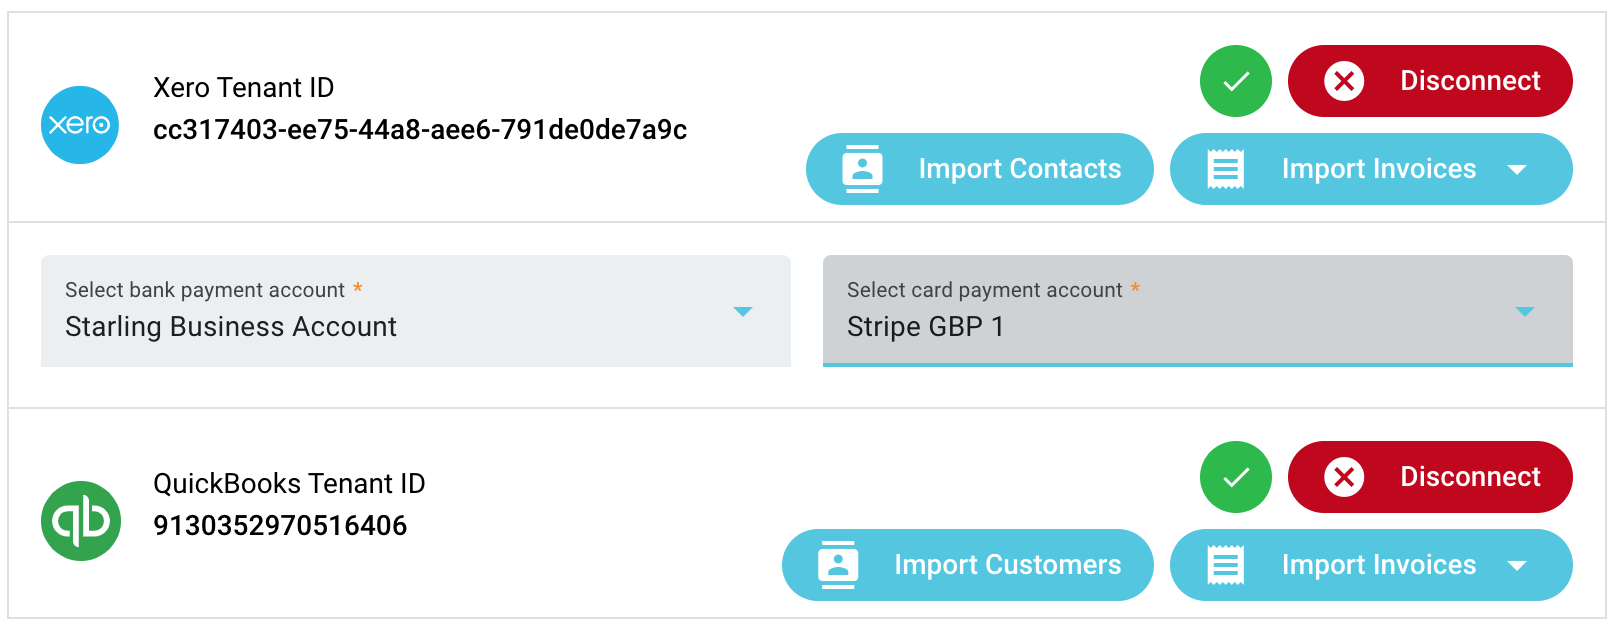
You can then import contacts and new invoices (it's necessary to import contacts before importing new invoices).
You can also add a message and send to your customer, with the preferred payment method embedded at the bottom of the invoice.
When a payment is made, the payment status is automatically updated in Xero or Quickbooks to "paid".
When a payment is made through the accounting app (eg if it has been paid via an email sent from Xero/Quickbooks) then payment status is updated in Converso to "paid" and no further reminders are sent.