A business must send a WhatsApp message template in order to start a business initiated conversation with a contact.
A template needs to be sent if it has been more than 24 hours since the customer last sent an inbound WhatsApp message to your business.
Once this 24 hours has expired you can no longer send a free form message to the customer, and will need to send a message template (a countdown timer is included at the top of the conversation panel to show you the time you have remaining out of the 24 hours).
This rule by WhatsApp is to ensure that businesses reply in good time to customers in order to provide a high quality messaging experience.
A message template can be almost any type of message - a customer care message, a payment request (eg invoice or checkout), an appointment reminder, delivery update, product alert, and more.
An example of message templates and contents that you can use for your own templates can be found here.
Message templates must first be submitted to WhatsApp/Meta for approval before they can be used. In the majority of cases, they are automatically checked for content and approved within a couple of minutes.
Message templates are stored in your WhatsApp Business Account WABA, and each WABA can have up to 250 message templates. Multiple phone numbers in a WABA can use the same template message.
Each template can have multiple language translations. For example, a message template called hello_world translated into two languages counts as one message template of the 250 limit.
Presently, you can only create messages in UK (GB) English.
Watch the video: creating a message template in the 360dialog client hub
Read the doc:
1. Creating a message template in the 360dialog client hub
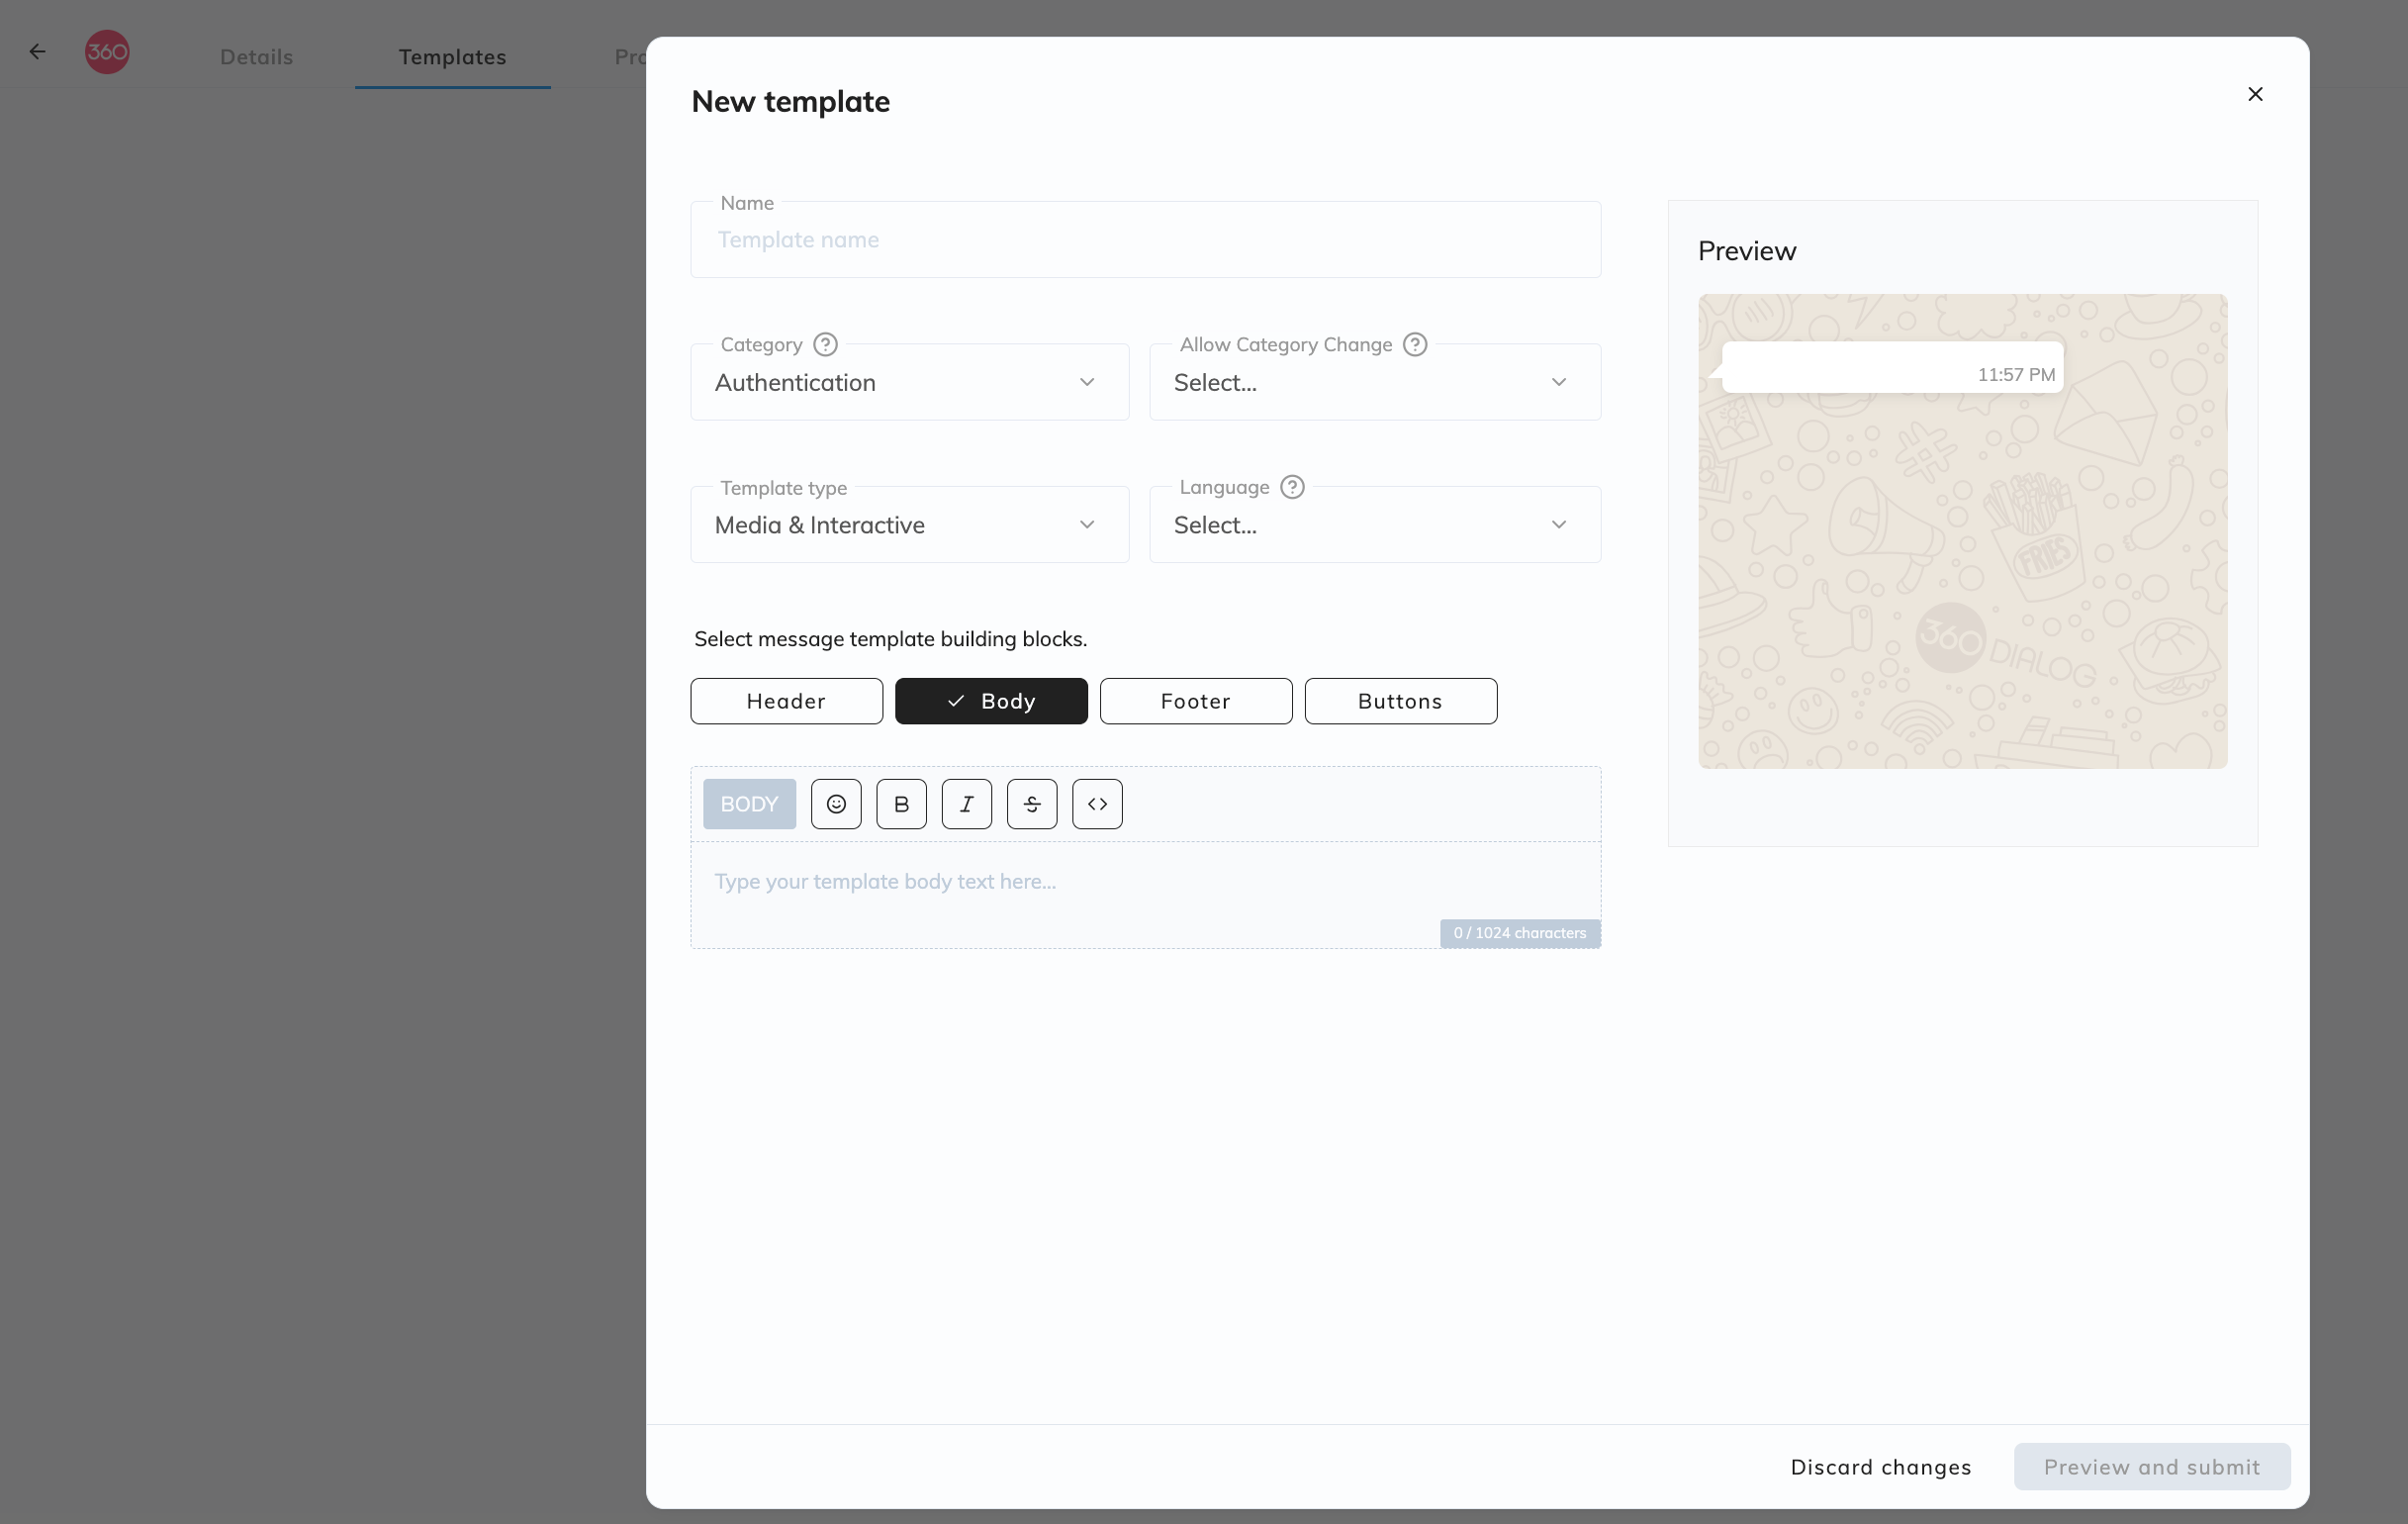
To add a new template, log in to your 360dialog hub (at app.360dialog.io) and click on Manage templates under WhatsApp accounts, and then click on + Add template.
When creating a message template, you need to include the following information:
> Template name - must contain only lowercase alphanumeric characters and underscores (_)
> Template category - there are three types of template type:
Utility conversations - Business-initiated conversations with customers that have opted into facilitating a specific, agreed-upon request or transaction, or update to a customer about an ongoing transaction, including post-purchase notifications and recurring billing statements.
Authentication conversations - Business-initiated conversations with customers that have opted into, enabling businesses to authenticate users with one-time passcodes (OTP), potentially at multiple steps in the login process (e.g., account verification, account recovery).
Marketing conversations - Business-initiated conversations with customers that have opted into, which may include promotions or offers, informational updates like a back-in-stock alert, or invitations for customers to respond or take action. A marketing conversation is any conversation that does not qualify as utility or authentication.
> Template language - templates can presently only be created in UK (GB) English.
> Allow template category change - selecting Yes will allow Meta to assign whatever category they determine to be appropriate to avoid template rejection due to miscategorization
> Template type - Standard (text only) or media and interactive template
If you decide on media template type, you have components of the template that consist of header, body, footer and buttons.
This will allow you to include other formats such as images and buttons, in addition to text:

Creating standard text only templates
Standard Message Templates only have a BODY section. In order to add a variable, insert {{#}} at the given position, where # represents the variable index, which needs to start at {{1}}.
Creating media templates
Media templates have more building blocks and features, and consist of the following building blocks:
Header:
The Header is optional and serves as the title or header of your template. It supports Text, Image, Document, Video, Location.
For the header you can display an image, for example your company logo or a product image. When you submit the template to Meta for approval, you will have to enter a URL path for the image, which needs to be in .png or .jpg format.
You can find more details on how to convert your image or logo files to a URL here.
Body:
The Body should contain the most important text of your template. Only text is supported.
Footer:
The Footer only supports text and can be used to provide less relevant information in your template message.
Button:
The button adds interactivity to your templates. There are two main types.
Quick Reply (QR) Button
- Used for getting quick answers from your client
- Max 3 Quick Reply Buttons per Template
Call to Action (CTA) Button
- Used to send your client to a Website or call a Phone Number
- Max one URL and Phone Number per Template
You can not mix QR and CTA buttons on the same template.
For CTA buttons, the URL button has a button with a static or dynamic URL behind it, and the Phone button connects to a pre-defined phone number.
For the URL button, to make it a variable or dynamic URL, insert {{#}} at the given position, where # represents the variable index, which needs to start at {{1}}.
For the Phone button, just insert the phone number in the given defined field.
All Templates require a Body, however Headers, Footers, and Buttons are optional.
The image below shows an example of a media template with header (image), body, call to action button and placeholder variables:
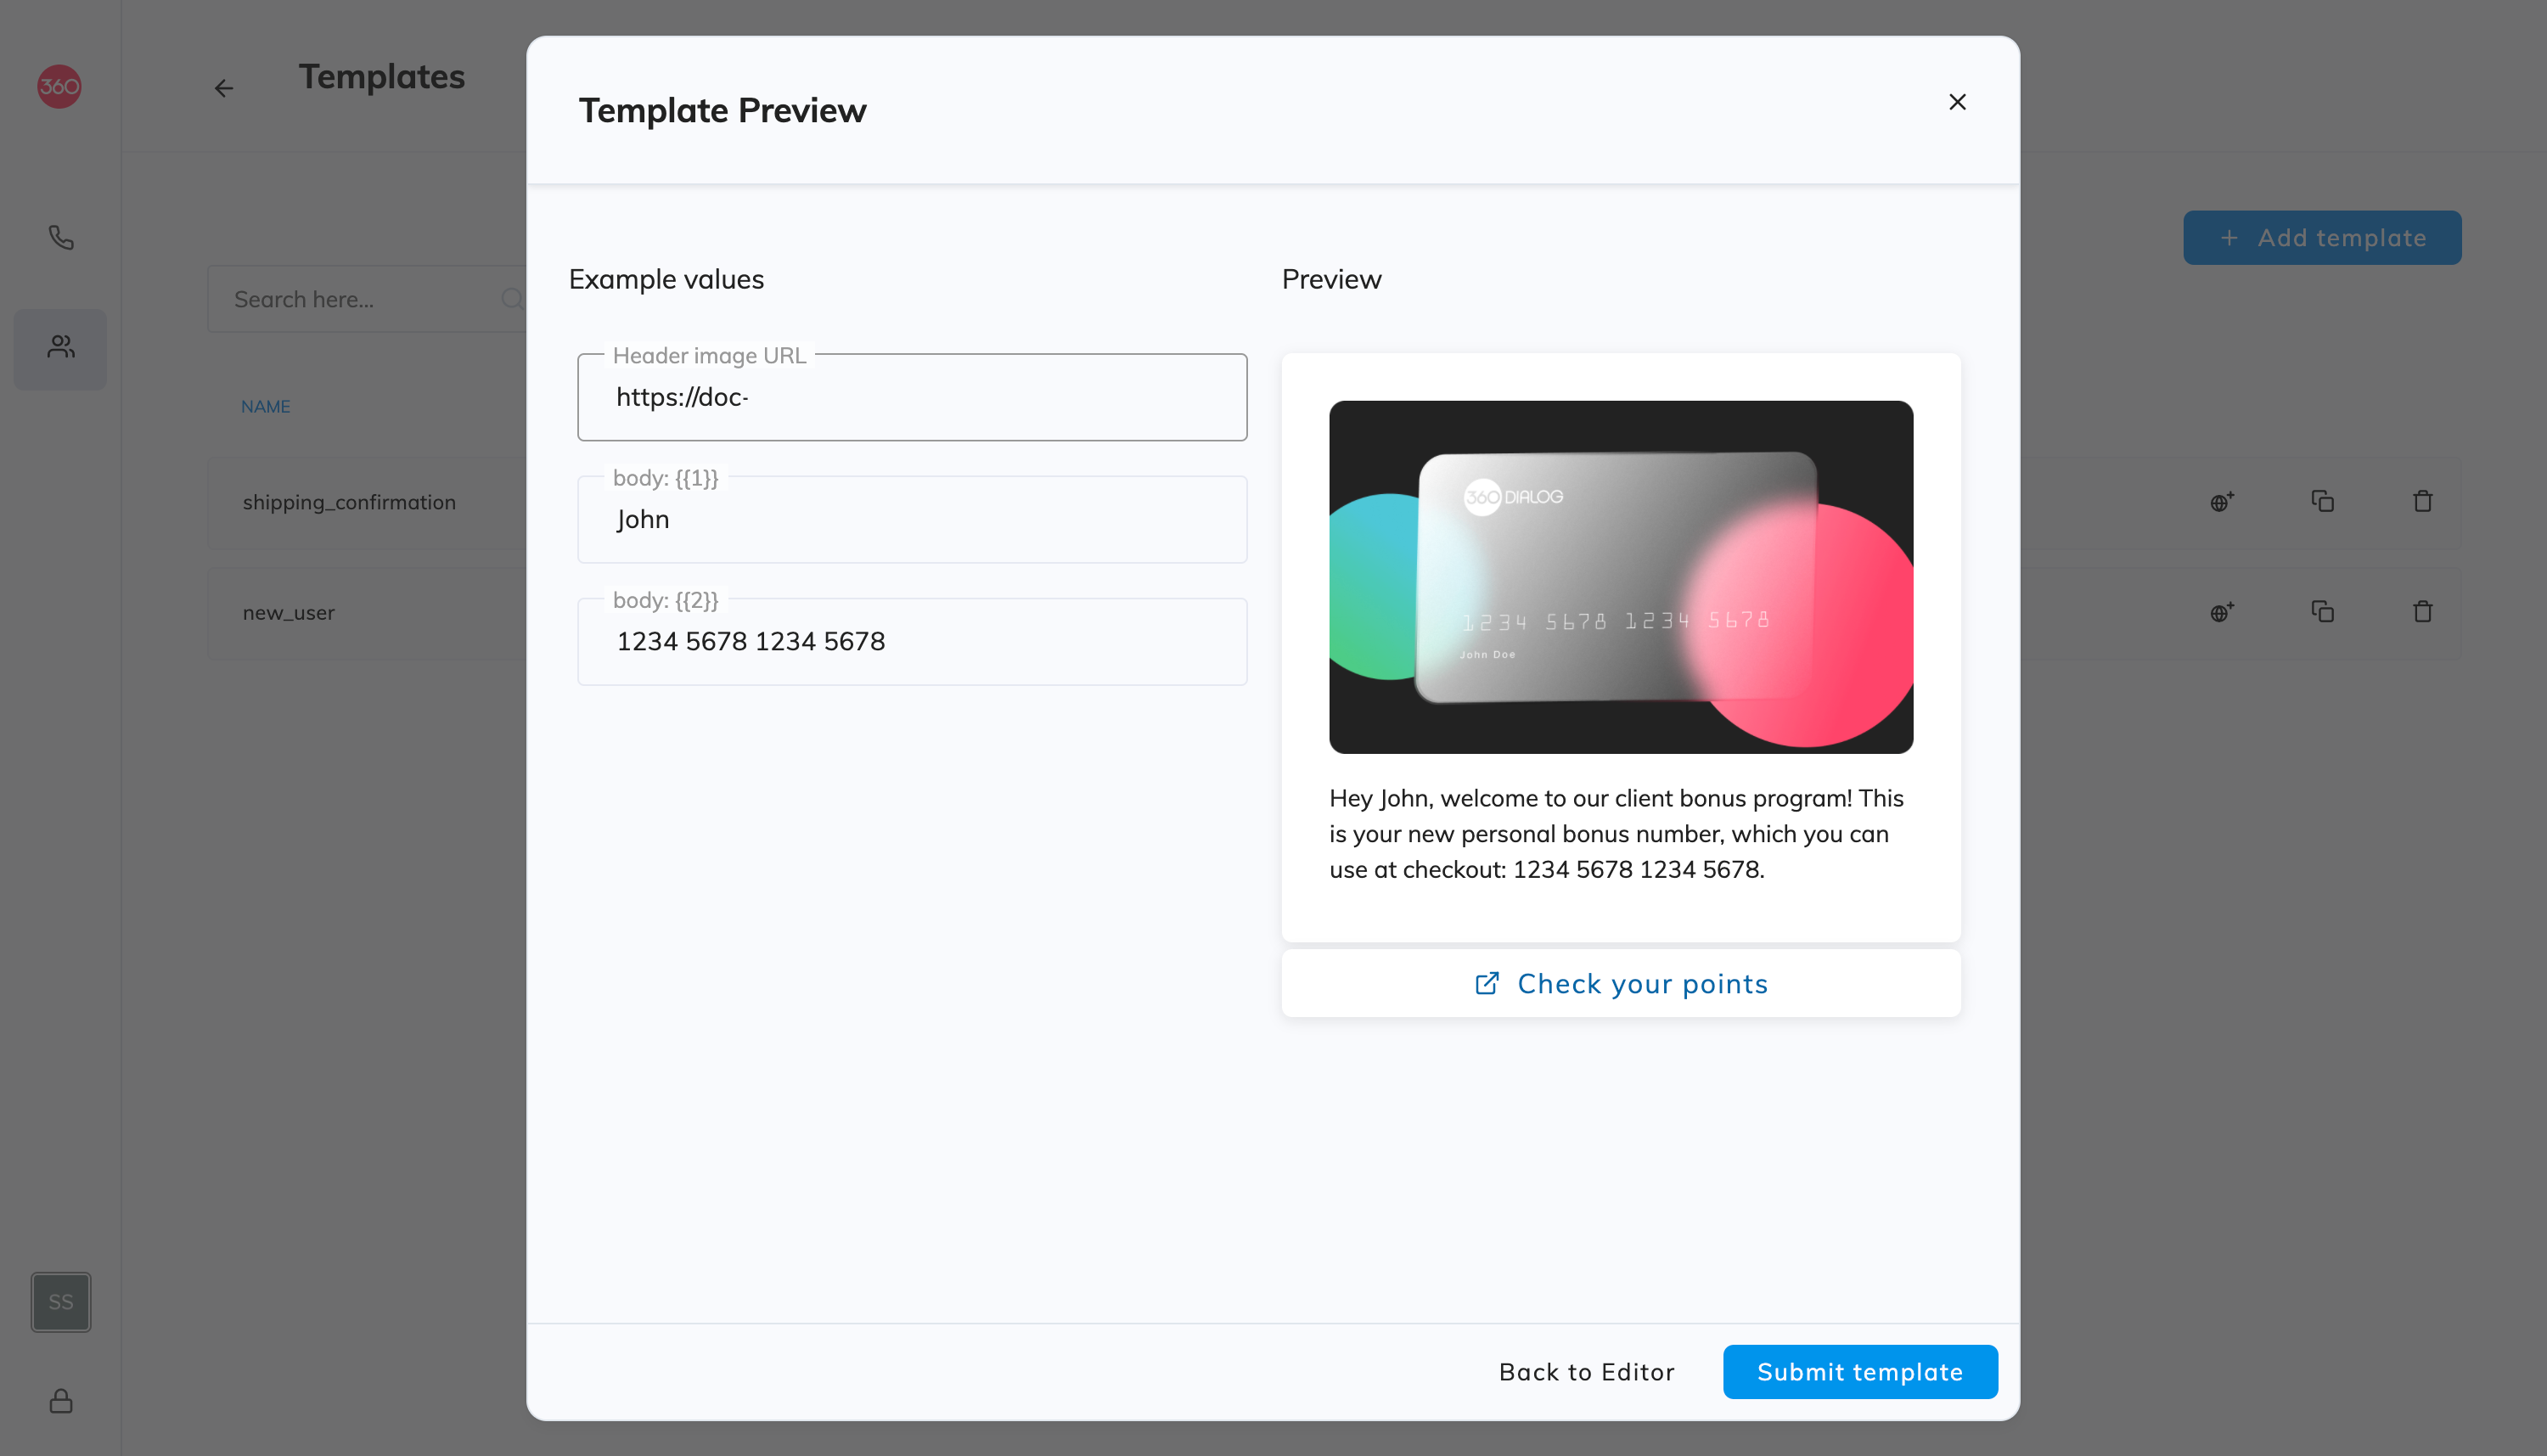
Remember: all media examples must be urls that point to a valid media file.
For examples of typical message templates (with headers, body etc) and use cases, please contact Converso Support at support@converso.io.
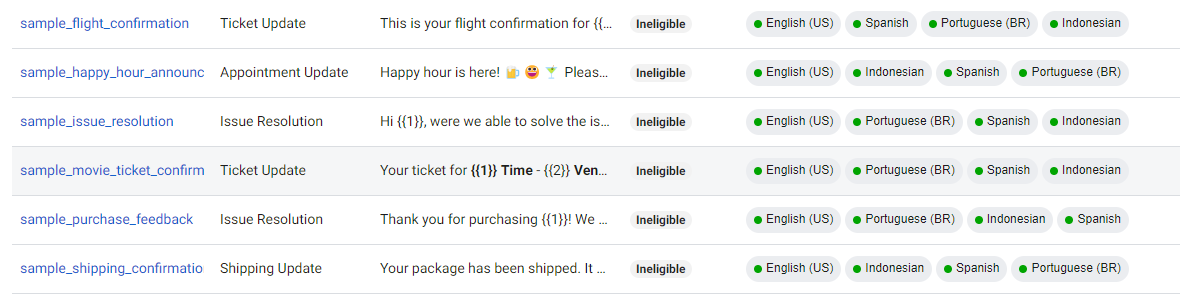
Sample templates
For all accounts, WhatsApp already registers a number of pre-approved sample templates. These templates can be used at any time and cannot be deleted. Sample templates always have sample_ in the name.
Variables
You can add variables as part of your text, by entering {{1}}, {{2}}.....{{n}} etc.
These variables can subsequently be mapped to placeholders in Converso. These are described below (more will be added later):
> [contact-firstname] - the contact's first name
> [contact-lastname] - the contact's last name
> [contact-company] - the contact's company name, if given
> [business-name] - the name of your business
Variables enable you to personalize your messages, making them more relevant and therefore more likely to be responded to.
Message templates for payment collection
If you want to send a message template that contains an invoice or checkout that you want your customer to pay, you can add specific payment variables to import those values from Converso's invoice or checkout list. This list can also be imported from accounting packages such as Xero or Quickbooks.
It's important to remember to classify the template type as "Utility" when creating a new template for payment collection.
You can use specific variables in your messages that use the following placeholders:
> [invoice-number] - the invoice number
> [invoice-date] - the invoice or checkout date of issue
> [invoice-duedate] - the invoice's duedate
> [invoice-overdue] - the number of days the invoice is overdue
> [invoice-total] - the invoice or checkout total amount
> [invoice-url] - the end variable of the payment URL for the invoice or checkout (after https://customer.converso.io/.....)
> You can therefore make the message body personalised to the contact and their invoice or checkout.
For the CTA button, you can define a button with description eg Pay now with a unique link to the customer's invoice.
For the URL entry, enter https://customer.converso.io/ or your own company domain (eg payments.yourcompany.com if this has been connected to the Converso domain).
Then add the variable {{1}} by clicking on the Add variable button in the CTA builder:
When creating the example URL for the preview, enter an example value eg i/abcdef123456/798nd80a5a6rurv7dwit for the unique payment URL.
Submitting the template for approval
Once you have created the template, the next step is to submit to Meta for approval via the Preview and submit button at the bottom of the form:

The preview helps Meta understand what type of image it is and enables rapid approval of the template.
You are then prompted to provide examples of the variables you have defined. This helps Meta in the template approval process.
Once you have provided examples, you can then submit the template to Meta for approval. This can be done by synchronizing the 360dialog page with Meta via the Synchronize with Facebook button:
![]()
Approval by Meta is usually an automated process and takes just a couple of minutes.
Once this has been approved by Meta, the template is automatically imported in to Converso.
2. Best practices for getting message templates approved
Clarity: be specific and clear. The reviewers may not be familiar with your business so clarity will help.
Avoid promotion: upselling, cold-call messaging, sending a poll to collect data, and including certain phrases that sound promotional are all considered promotional.
Spelling: check for spelling and grammatical errors and use appropriate formatting (e.g., double curly brackets for parameters).
Name: make your message template name clear. Instead of using a name like template_014, use bus_ticket_details. Remember that someone from Facebook will be reviewing your templates, and providing more clarity gives reviewers context around how the template will be used.
Create context: if you need to write a message template to re-open the 24-hour window, we would suggest starting with some mention of the previous conversation thread.
Choose an appropriate category: don’t forget to use the correct message template type. Choosing the correct one will increase the chances of getting your templates approved and will provide more information to WhatsApp during the approval process.
The categories are Transactional, Marketing or One-time password.
Header (optional): you can add a title or choose which type of media you'll use for this header. Image, PDF and Video is supported.
3. Managing message templates
You can submit a message template for approval by Meta, and manage your approved templates, from within your 360dialog client hub (app.360dialog.io) or directly in your Facebook WABA account.
You will also be able to see the status of your message templates in either your 360dialog client hub, or in your WABA.
In order to send WhatsApp messages, your message templates need to be imported into Converso. This is done automatically at frequent intervals, and can also be done by refreshing your browser or clicking the Refresh message templates button under Admin > Message templates.
Message templates can then be used to start conversations with your contacts.
In the near future, you will also be able to create and edit message templates directly in Converso without having to access your 360 client hub, or your WABA.
4. Template mapping in Converso
Once you have imported templates into Converso, you can then map the variables that you entered when creating the template to placeholders available in Converso.
This is done under Admin > Message templates:
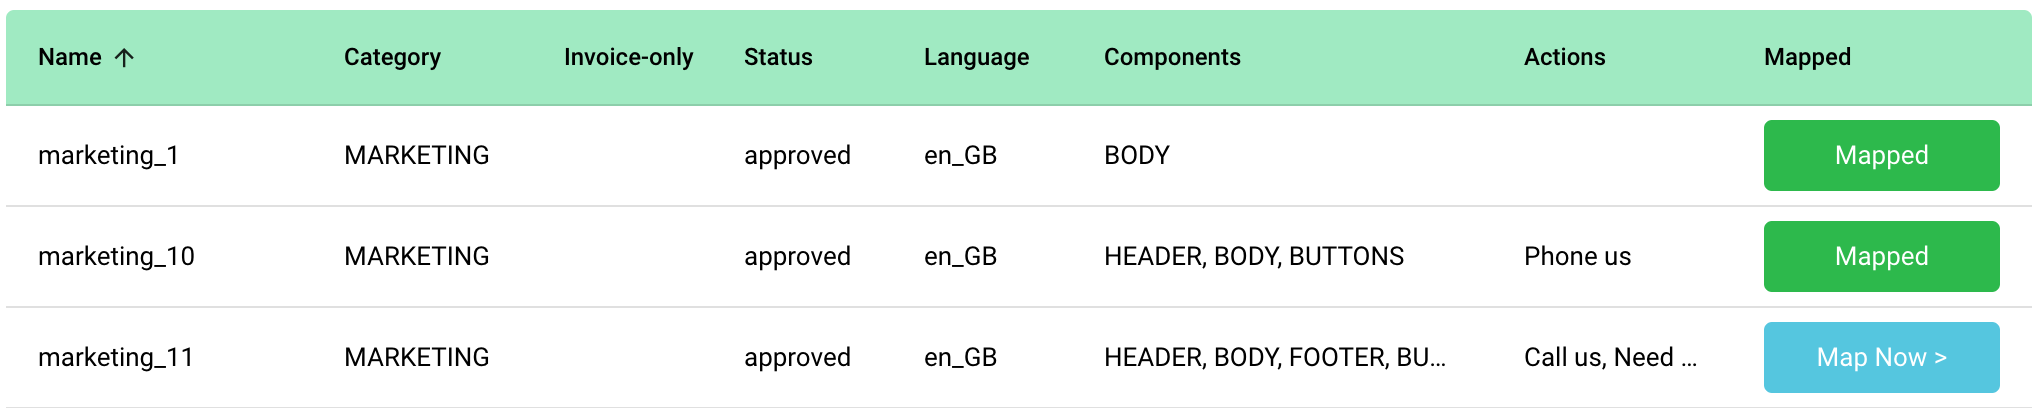
Click on the template entry to match with the relevant Converso placeholder.
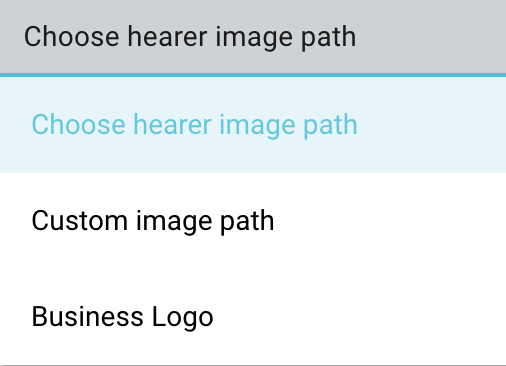
For the header, select from the drop down under Header variables mappings and define a URL of an image you wish to use, or use your business logo (loaded from Settings > Business) :
(You therefore don't need your logo as a URL, as you can use your logo saved in Settings and it will then be used as your message header).
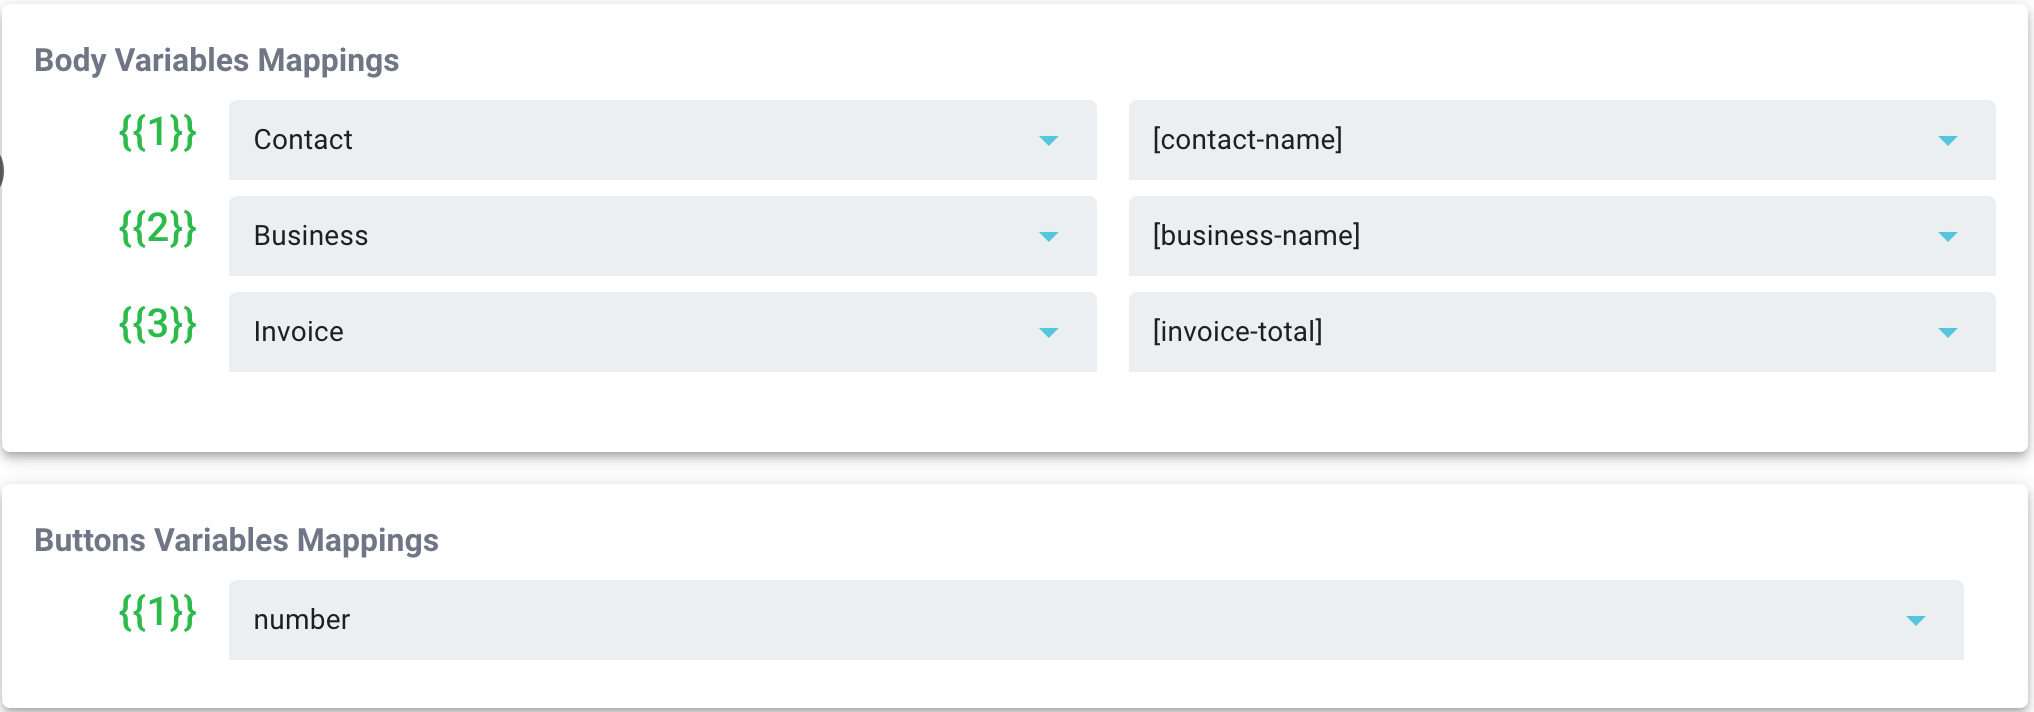
For the other variables, choose from the drop downs for type, then the selected placeholder, and click Save:
For those templates that have no variables, you will also need to open the template, and also click Save.
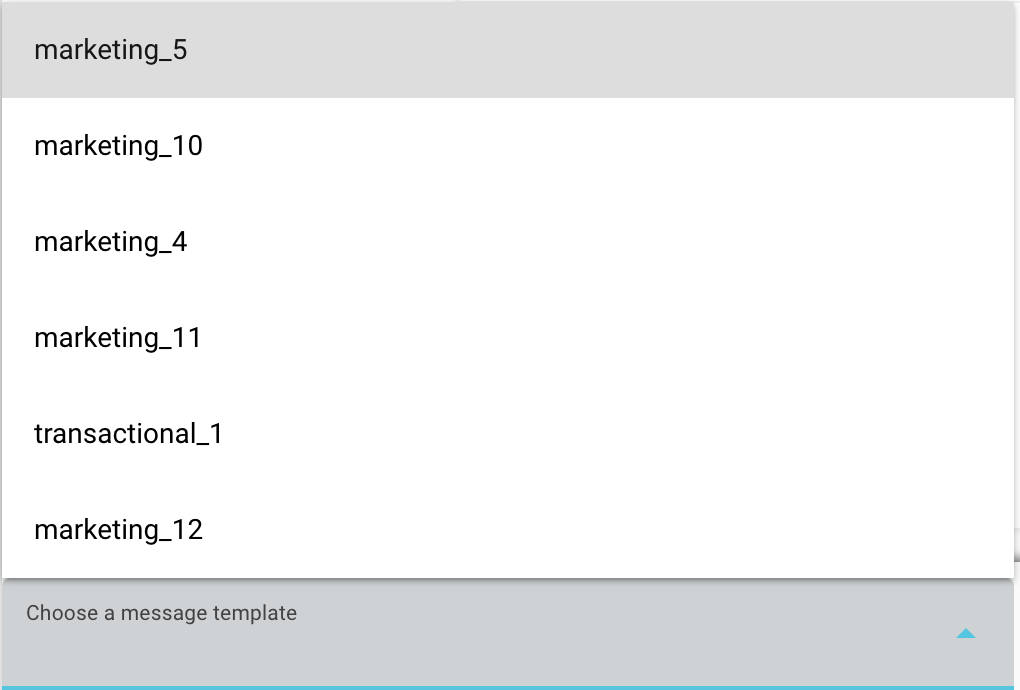
Once you click Save you will then be able to see all the mapped templates in the New message and message tray:
For message templates that are payment requests for invoices, make sure you tick the box defining the message template for invoices:

For mapping the Pay button variable, go to the Buttons variables mappings section, and map to the invoice-URL placeholder:

Your message template can then be selected when you create an invoice or add send details to one already imported from Xero or Quickbooks, to send via WhatsApp.
The contact will then receive a personalised message and payment request:
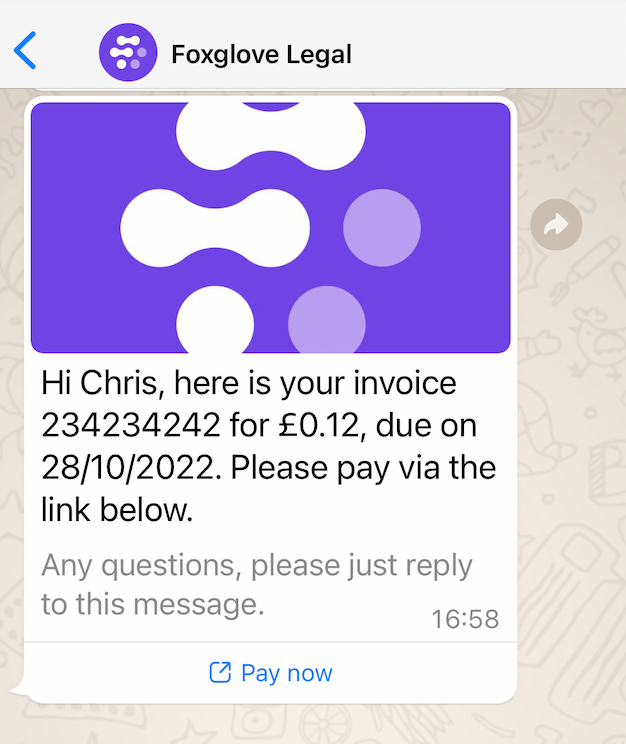
The variables contained within the template are now populated with real values from Contacts and Invoices.