1. Description
The Contacts section contains specific information about a client or customer, including:
> First, middle and second name
> Contact and billing address
> Business name
> Phone number
> Tags
A contact is automatically created when a WhatsApp or SMS message is received from a new contact. The number is saved together with dummy values for the first name and surname.
When further details are obtained from the contact, the entry can be manually updated by an agent.
2. Adding and deleting contacts
A new contact can be added manually in Contacts by inputting at least the first and last names, and either phone number or email, or both.
It is advised that the contact's mobile number is inputted as their phone number.
The phone number and email (whether belonging to an agent, admin or contact) acts as the unique identifier of a contact or user, and can not be used twice in a business.
So you can not add an agent or admin's phone number also to contacts.
A contact can only be deleted if they have no conversations or invoices open. If they have invoices or conversations open, when a contact is deleted it will be set as "non active" and archived.
If a contact is archived and a message is subsequently received from that contact, the previous defined contact name will be associated with the number. If a message is received from an archived contact, it will re-activate the contact.
In order to disassociate a contact name with a number, it's necessary to edit the contact and delete or change the number saved, rather than delete.
3. Importing contacts
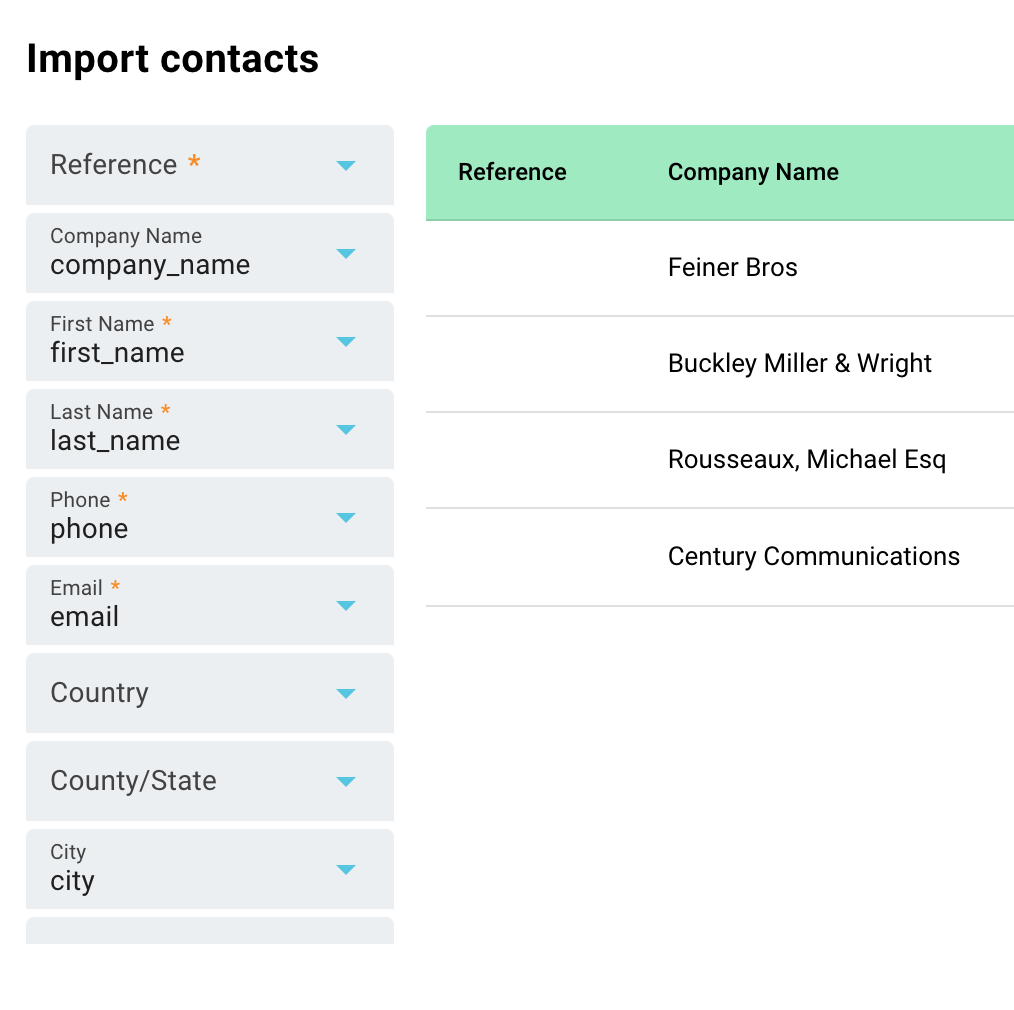
Contacts can be imported via CSV. Just go to Contacts and click on the Import contacts button, and upload your CSV contact list.
Make sure that the column headers in your contacts sheet are in the top row, and that there are no gaps in the rows or columns.
The loader will then automatically map, where possible, the column headers of your contacts to the fields in Contacts, as illustrated below. Any remaining columns that are not auto mapped can be mapped manually via the drop downs in the left hand column.
It is important to classify phone numbers correctly in the CSV. International numbers should include the prefix and a + sign before the number (eg +44 for UK). Numbers without an international prefix will be treated as a number from the business's country of origin.
Make sure you map at a minimum, the first name, the last name, and either or both of the phone and email.
It's also possible to import contacts from Xero and Quickbooks, and other CRM apps.
When Xero or Quickbooks contacts info is imported, if the contact already exists in Converso, that contact will be updated with any additional info contained in Xero/Quickbooks. When updates are made in Xero/Quickbooks, these are synced with Converso.
4. Tags and conversation visibility
You can add tags to a contact via the drop down under tags (tags are created by Admins under Settings > Tags). This will allow you to then send broadcast messages to specific Contact groups via defined tags.
It's also possible to set the visibility of new conversations from a contact. This means that you can choose which user (agent or admin) can see a new inbound conversations from the user via Manage conversations.
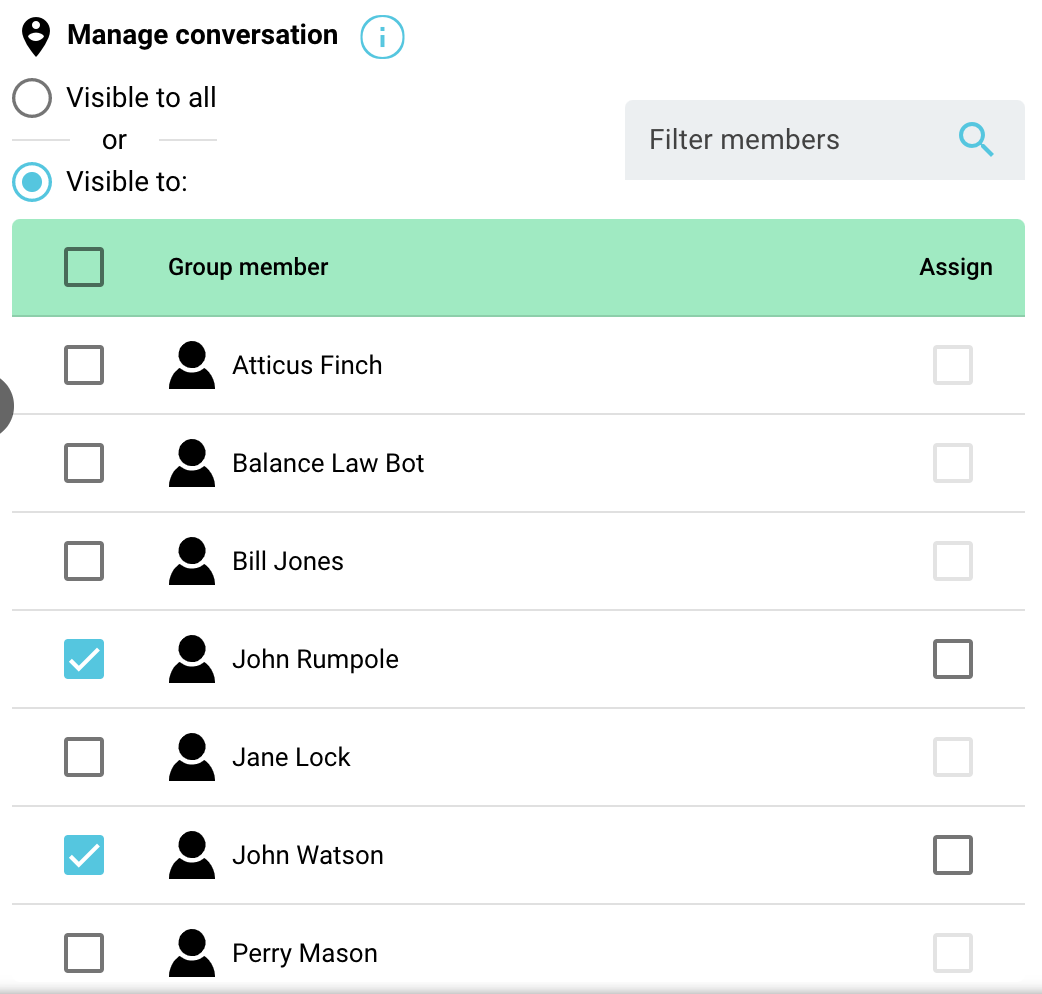
You can also set the assignment of all messages received from a contact, so when a new message is received, it is automatically assigned to that particular agent.