Payment requests consist of invoices and checkouts that can be created and sent to contacts via WhatsApp, SMS or as a payment link. The payment request form is used to create new invoices and checkouts, and provides an option to creating an invoice in an external accounting application (such as Xero or Quickbooks).
An invoice or checkout payment request consists of a customer-facing web page accessed via a randomized, unique link that is generated for each invoice or checkout.
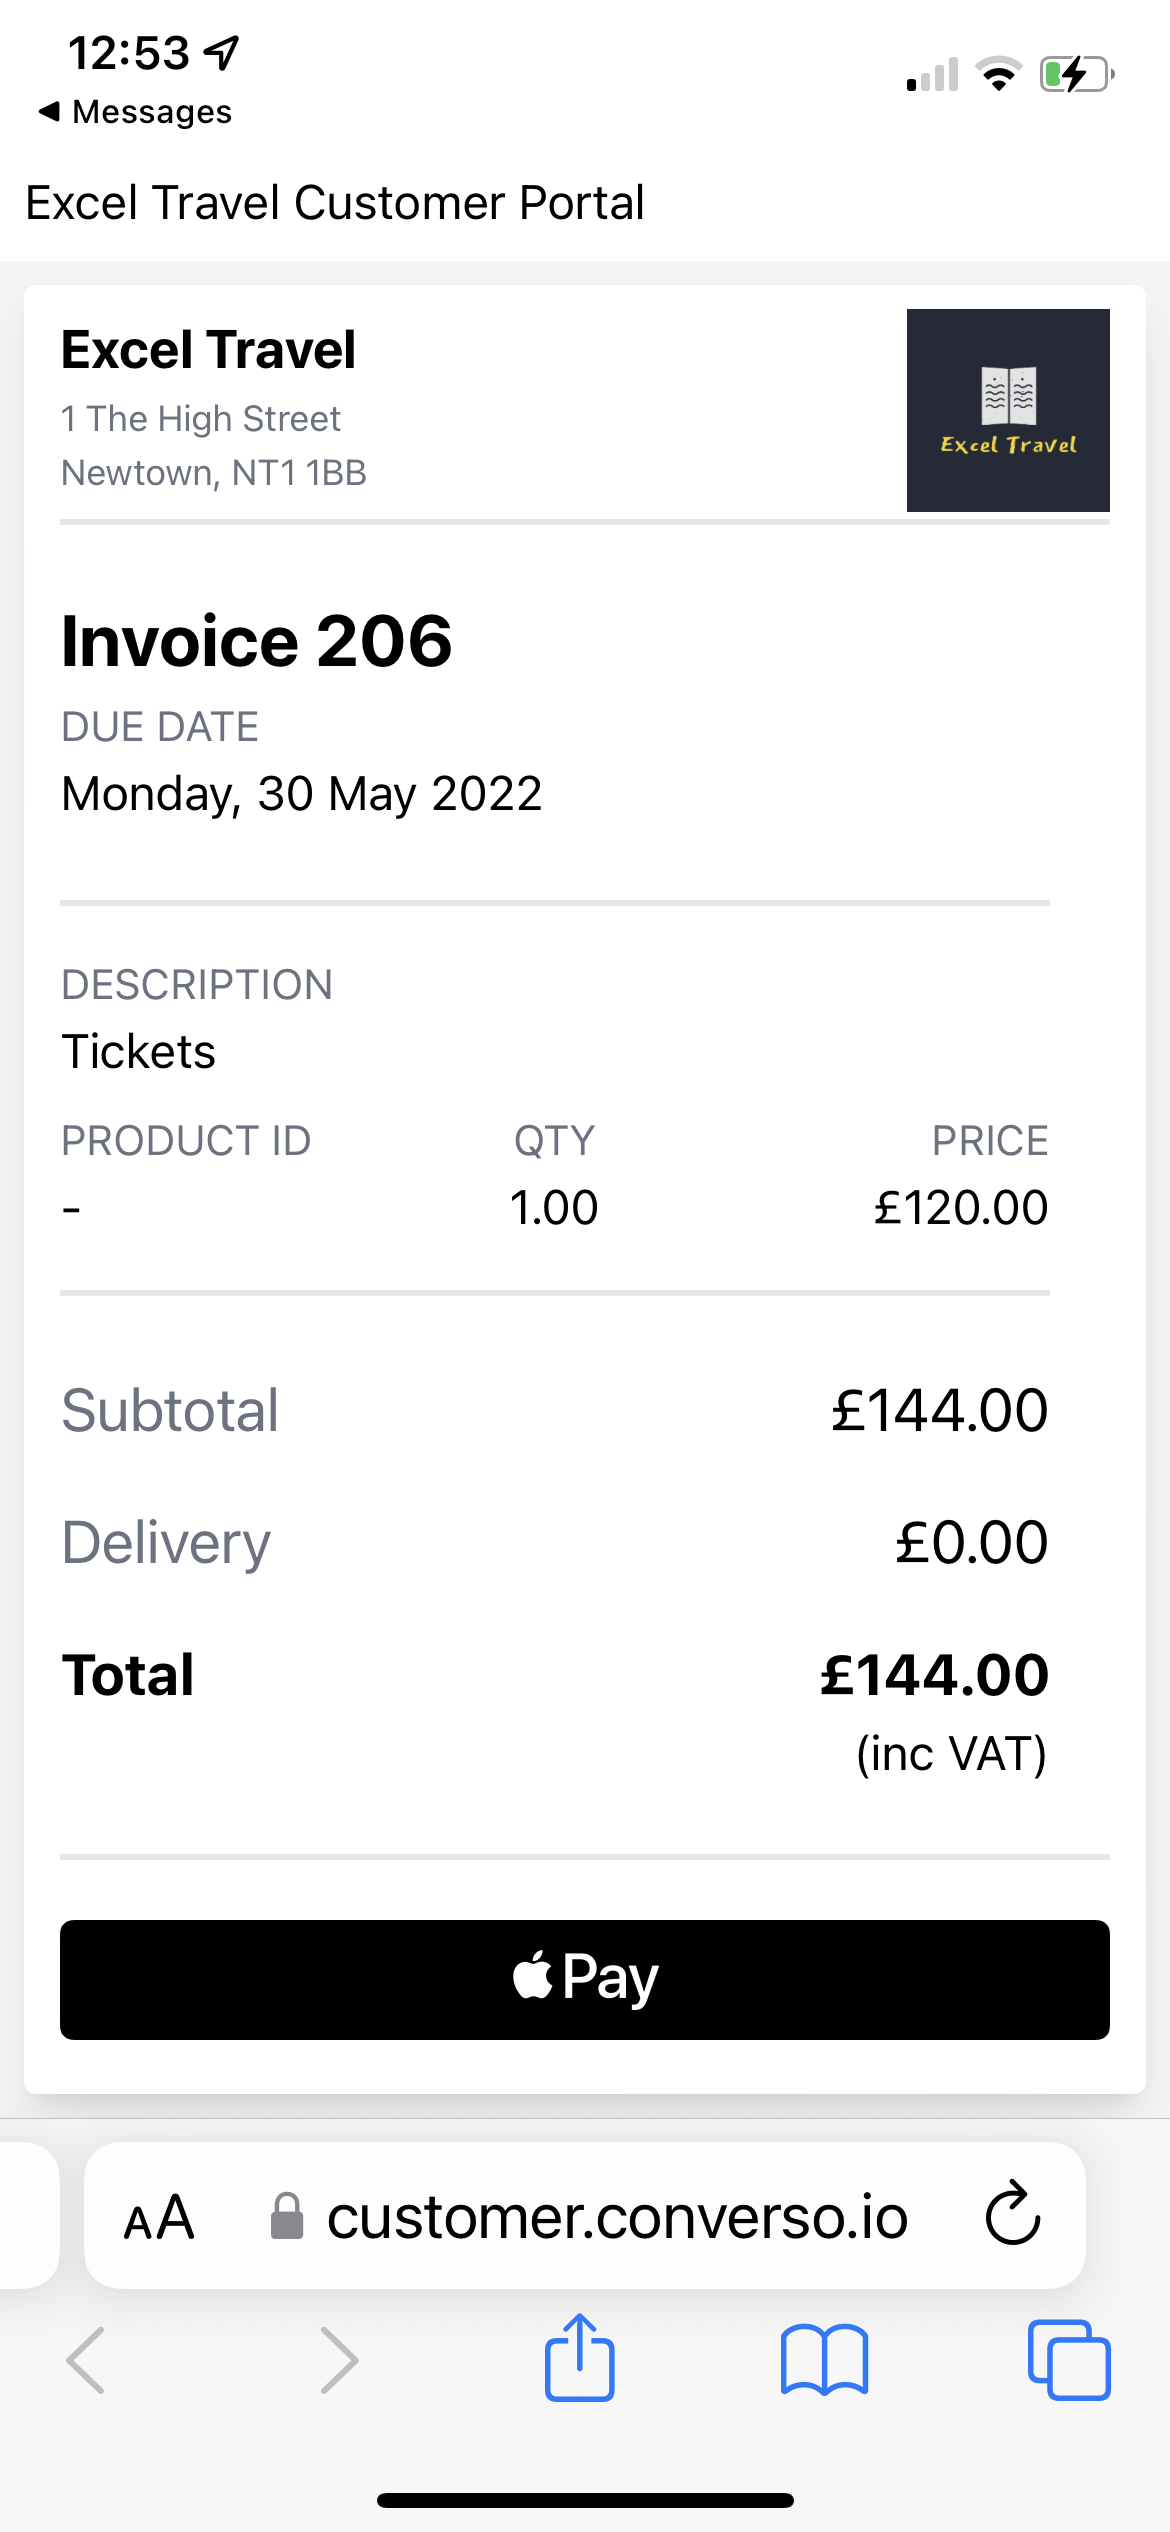
It includes the details of the contact and the supplier, a description of the product to be paid for, the price of the product, the due date and pay buttons with relevant payment methods.
A payment request form is used to create invoices and checkouts.
An invoice is used for requesting payment for products and services that the contact is required to pay. It counts as a sale when issued.
A checkout is used to request payment for products and services where the contact is not obliged to pay. There is no due date, and it counts as a sale only when paid.
(Payment requests can presently be sent only to single recipients. Multiples that can be sent to tagged groups and multiple contacts is due to be released soon).
1. Creating and sending invoices and checkouts
Invoices and checkouts can be sent as a single communication, for instance collecting money due for products delivered or work completed.
Alternatively an invoice or checkout can be sent as part of a WhatsApp or SMS conversation with a contact. For instance, the contact may enquire about the possibility of buying a new product, and the sale can be completed in the same conversation by attaching an invoice.
You can also chat with your contact to resolve any payment queries within the conversation.
To start a message conversation, just click on the New message icon.
2. Set up
Before sending invoices or checkouts, it's important to input your company address and upload your business logo under Settings > Business.
Your logo and your company name and address will now be included at the top of future invoices and checkouts, making your payment requests look more professional with your own branding.
3. Creating and sending a new invoice or checkout
Click on the "+" icon next to Invoices or Checkouts in the side menu.
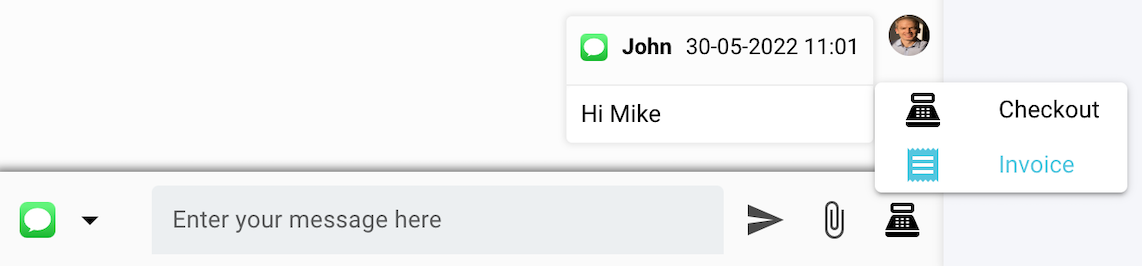
Or if you want to send an invoice or checkout as part of an existing conversation, click on the Checkout icon on the right of message tray:
Add contact Under Add contact you can choose the recipient, and also make changes to the contact's details for that specific invoice (these changes will not be saved under Contacts and are specific to that invoice).
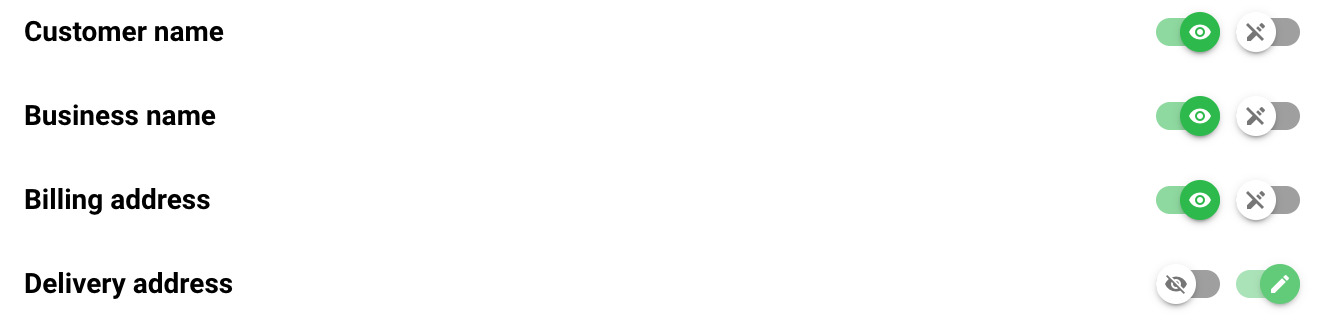
You can also define what fields are visible to the contact, and what data is collected from, or can be amended by, the contact.
This includes contact name, customer’s business name, billing address and delivery address. To make these fields visible and editable, switch on the relevant toggle switch:
Add details Under the Add details section, it’s possible to add details such as invoice number, due date, currency etc.
Invoice numbers can be added manually, or they can be generated automatically.
If the invoice number is left blank, the number will be generated automatically. Invoice numbers are incremented by 1 from the previous highest invoice number. Invoice numbers are auto generated after the Send tab is clicked.
If you manually enter an invoice number that has already been entered, it will automatically increment by 1 from the previous invoice number.
Add product Under Add product section, you can define details of the product or service that you want to collect payment for. You need to enter a minimum of description and price in order to continue. If taking payment via card, the total price needs to be a minimum of £0.50 (in order to be processed by Stripe).
It is also possible to add discounts to apply to either each line item as a %, or a one-off discount amount to the total cost.
Line % discounts are applied to each line and are shown on the contact's invoice or checkout, also on each line.
One-off discounts can be applied by adding "Discount" in the product code field, this will add a negative value and take out the Discount % field. You can now add a financial value for the discount and this will be summed in the sub total.
A delivery charge can also be applied by adding "Delivery" in the product code.
The delivery and discount amounts will be shown in the last rows of the invoice or checkout.
Create message and link It's possible to choose to send an introductory message with payment link to the contact's mobile number, or create just a payment link.
The payment link can be copied and sent to the customer over another channel, such as email. The payment status of links generated in this way can be tracked under Invoices or Checkouts.
For sending an introductory message, a pre-populated message is included, with placeholders to personalize the message. When the text message is sent, the payment link is automatically attached below the message:
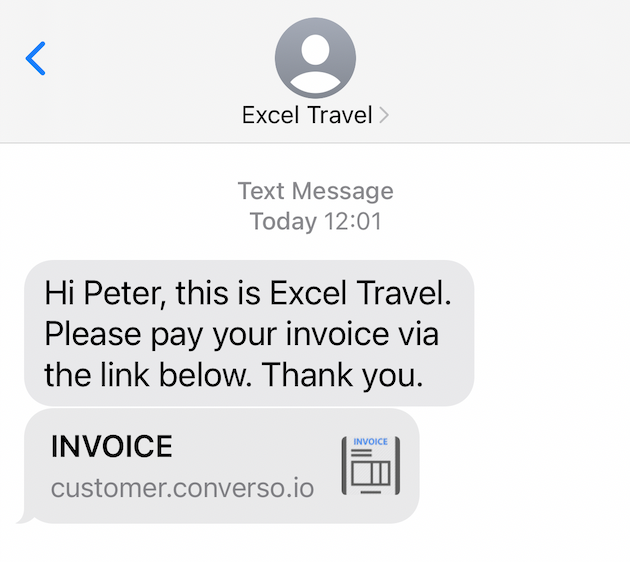
The message should ideally include an explanation of its contents, together with your business name, and how to make payment.
The contact then has a clear understanding of the nature of the message and next steps.
Set workflow Set workflow lets you choose a workflow that will send reminder text and WhatsApp messages for the invoice or checkout when it is unpaid and/or becomes overdue.
Reminders can be sent before the invoice is due, on the due date, and after the due date. It’s also possible to send reminders that repeat after a certain frequency.
Each reminder message also includes the payment link for the invoice or checkout so the contact can also pay without leaving the conversation.
You can turn off reminders by going to the relevant invoice or checkout, going to "Customize workflow" and deleting the relevant reminder. This change will only be saved against that invoice or checkout.
For notification to the contact of successful payment, you can define a thank you text message that is sent after payment is successfully completed.
All messages can be personalised through placeholders.
When sending checkouts, it’s also possible to define an announcement on the success page that the customer sees after they have completed payment (eg “Thank you for your order, all our orders are dispatched within 24 hours”).
Once the message and request has been sent, a notification will be added in the conversation panel:
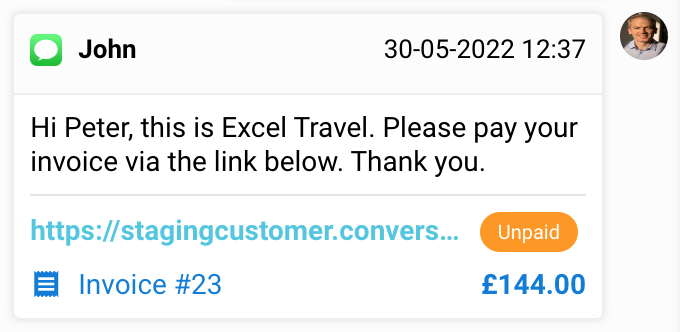
The invoice or checkout will also appear in the invoice or checkout list located in the left hand margin.
When an invoice is sent to a contact, it appears as an attachment to the text message, and can be accessed by clicking on the link, which opens the unique URL for the invoice, with fixed payment buttons and slider for the contact to review the whole invoice:
When the invoice is paid, the invoice is updated with "Paid" status in real time, and a "thank you" message is sent (depending on the workflow). The contact can also follow up the conversation for support if required, without having to migrate to another channel.
4. Changes
Once an invoice or checkout has been sent, it’s possible for the user to edit values in all fields upto the point when it’s paid. This is done by accessing the payment request form via the conversation notification or invoice list, and making the desired change, and clicking Save.
Once changes have been saved, these are then updated on the contact’s version of the payment request in real time, and can be viewed after the invoice page has reloaded.
It’s also possible for the end customer to make changes to an unpaid invoice or checkout if the Details edit box has been turned on (as described above). These changes are saved to the invoice or checkout after payment has been made.
5. Payment
When the contact pays an invoice or checkout, the status changes to "Paid" within the conversation notification, and in the invoice/checkout list.
It’s also possible to manually mark an invoice as paid, if it has been paid by another source eg by cash. This can be done by ticking the “Mark as paid” box in the Details section, entering a date and the payment method, and clicking Save.
After an invoice is paid, a copy of the invoice, with “Paid” status, is attached to the payment request form, with any updated contact info (eg a new address).
After a checkout is paid, a “Paid” invoice copy is created with the contact’s data. This can also form a receipt.
It’s also possible to copy the URL of the paid invoice and send it to the contact to confirm payment. The contact can download and print the invoice too, if required.
In addition, after payment the customer is able to view a PDF version of the paid invoice by clicking the PDF icon on the web invoice located at the payment link. They can then download the document.