Invoices created in Xero can be imported into Converso to send via text message to contacts. It's then easy for contacts to pay in a couple of clicks via a link in the text message.
1. Connecting to Xero
i) To connect with Xero, first go to Settings > Integration and under Xero, click on “Connect to Xero”.
ii) You'll be prompted to confirm consent to connecting your Converso account with Xero:
iii) Connect to Xero via the Xero connection window.
iv) Once you have connected, the connection confirmation page will appear, which you can then close.
v) You will then be redirected back to the Settings > Integrations screen:
2. Set up
You need to set up the Xero integration so you can import your Xero invoices, add a message, and send by text:
i) Connect with Stripe and Crezco for payments
Converso uses Stripe for card payments, so you will need to connect your Stripe account to Converso at Settings > Payments in order to accept card payments.
If you don’t have a Stripe account, you can create one in just a few minutes by clicking on the Stripe link at Settings > Integrations, and follow Stripe's instructions.
You can also connect with Crezco for Pay by Bank payments (as an Open Banking product) under Settings > Payments.
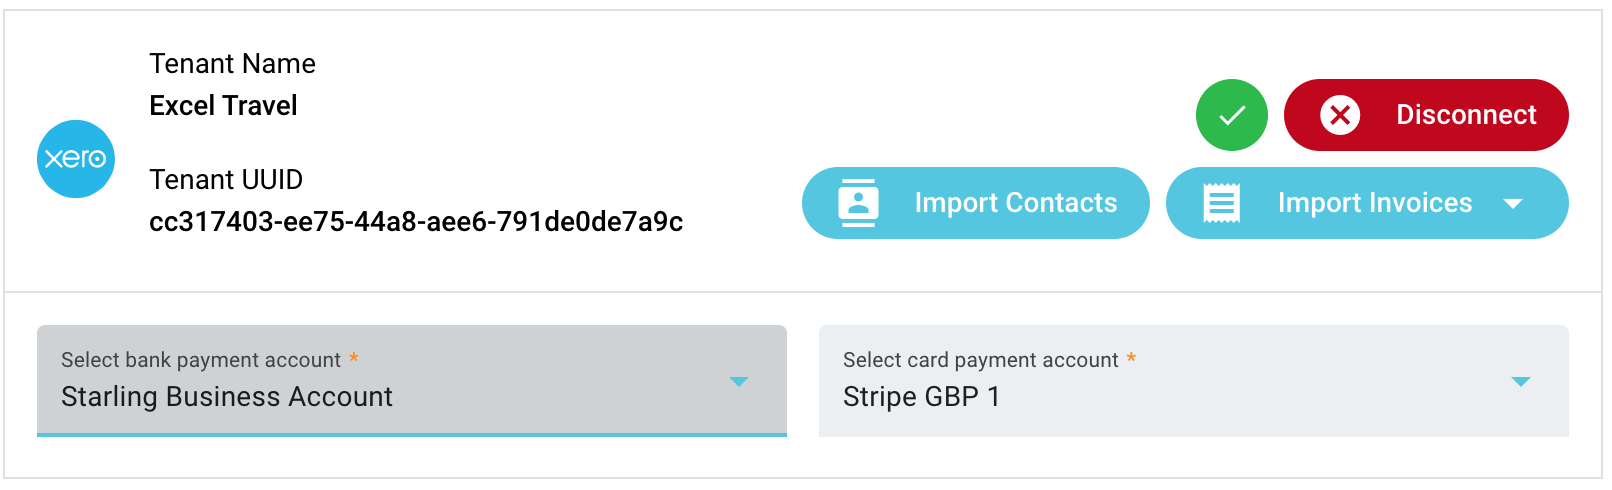
ii) Define Xero accounts for bank and card payments
In order to reconcile your payments against the correct account, you will need to define which are the correct Xero accounts for bank and card payments.
Under "Select bank payment account" choose the bank account to which bank payments are made.
Invoice payments made by Pay by Bank will then be recorded against this account in Xero, and can be reconciled against each Xero invoice.
Similarly, repeat for your Stripe account in Xero for card payments.
If you haven't connected your Stripe account in Xero, you can complete this in a couple of minutes in Xero under Accounting > bank accounts.
(Xero also prompts you to connect your Xero account to Stripe so payments can be automatically downloaded to Xero).
Back in Converso, choose the new account that you have created in Xero for Stripe payments from the drop down list under Select card payment account (in the example below, “Stripe GBP”), and click Save.

Invoice payments made by card will then be recorded against this account in Xero, and can be easily reconciled against each Xero invoice.
3. Importing invoices
i) Historic invoices
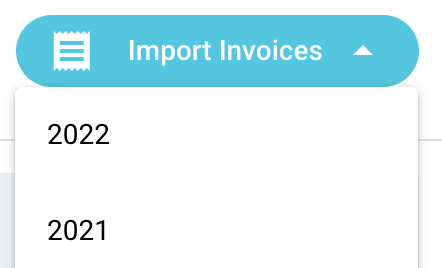
You can import past invoices from Xero in order to send reminders to those remaining unpaid. Under Settings > Xero, click on the "Import Invoices" and choose the invoice year that you wish to import:
Click import, and your historic invoices will appear, after about 20 seconds, in the Invoice list in Converso. All the invoice details as well as contact details will be imported for each invoice.
You can then add a message and send the invoice to the contact via text.
If the contact pays via their original Xero invoice, the status will be updated to "Paid" in Converso, and similarly, if the invoice is paid via the Converso invoice or reminder, the status will be updated to "Paid" in Xero.
ii) Importing new Xero invoices
After you integrate your Converso account with Xero, any invoice that you create in Xero will also be imported into Converso.
The example below shows creating an invoice in Xero’s classic format - when approved, it's automatically imported to Converso.
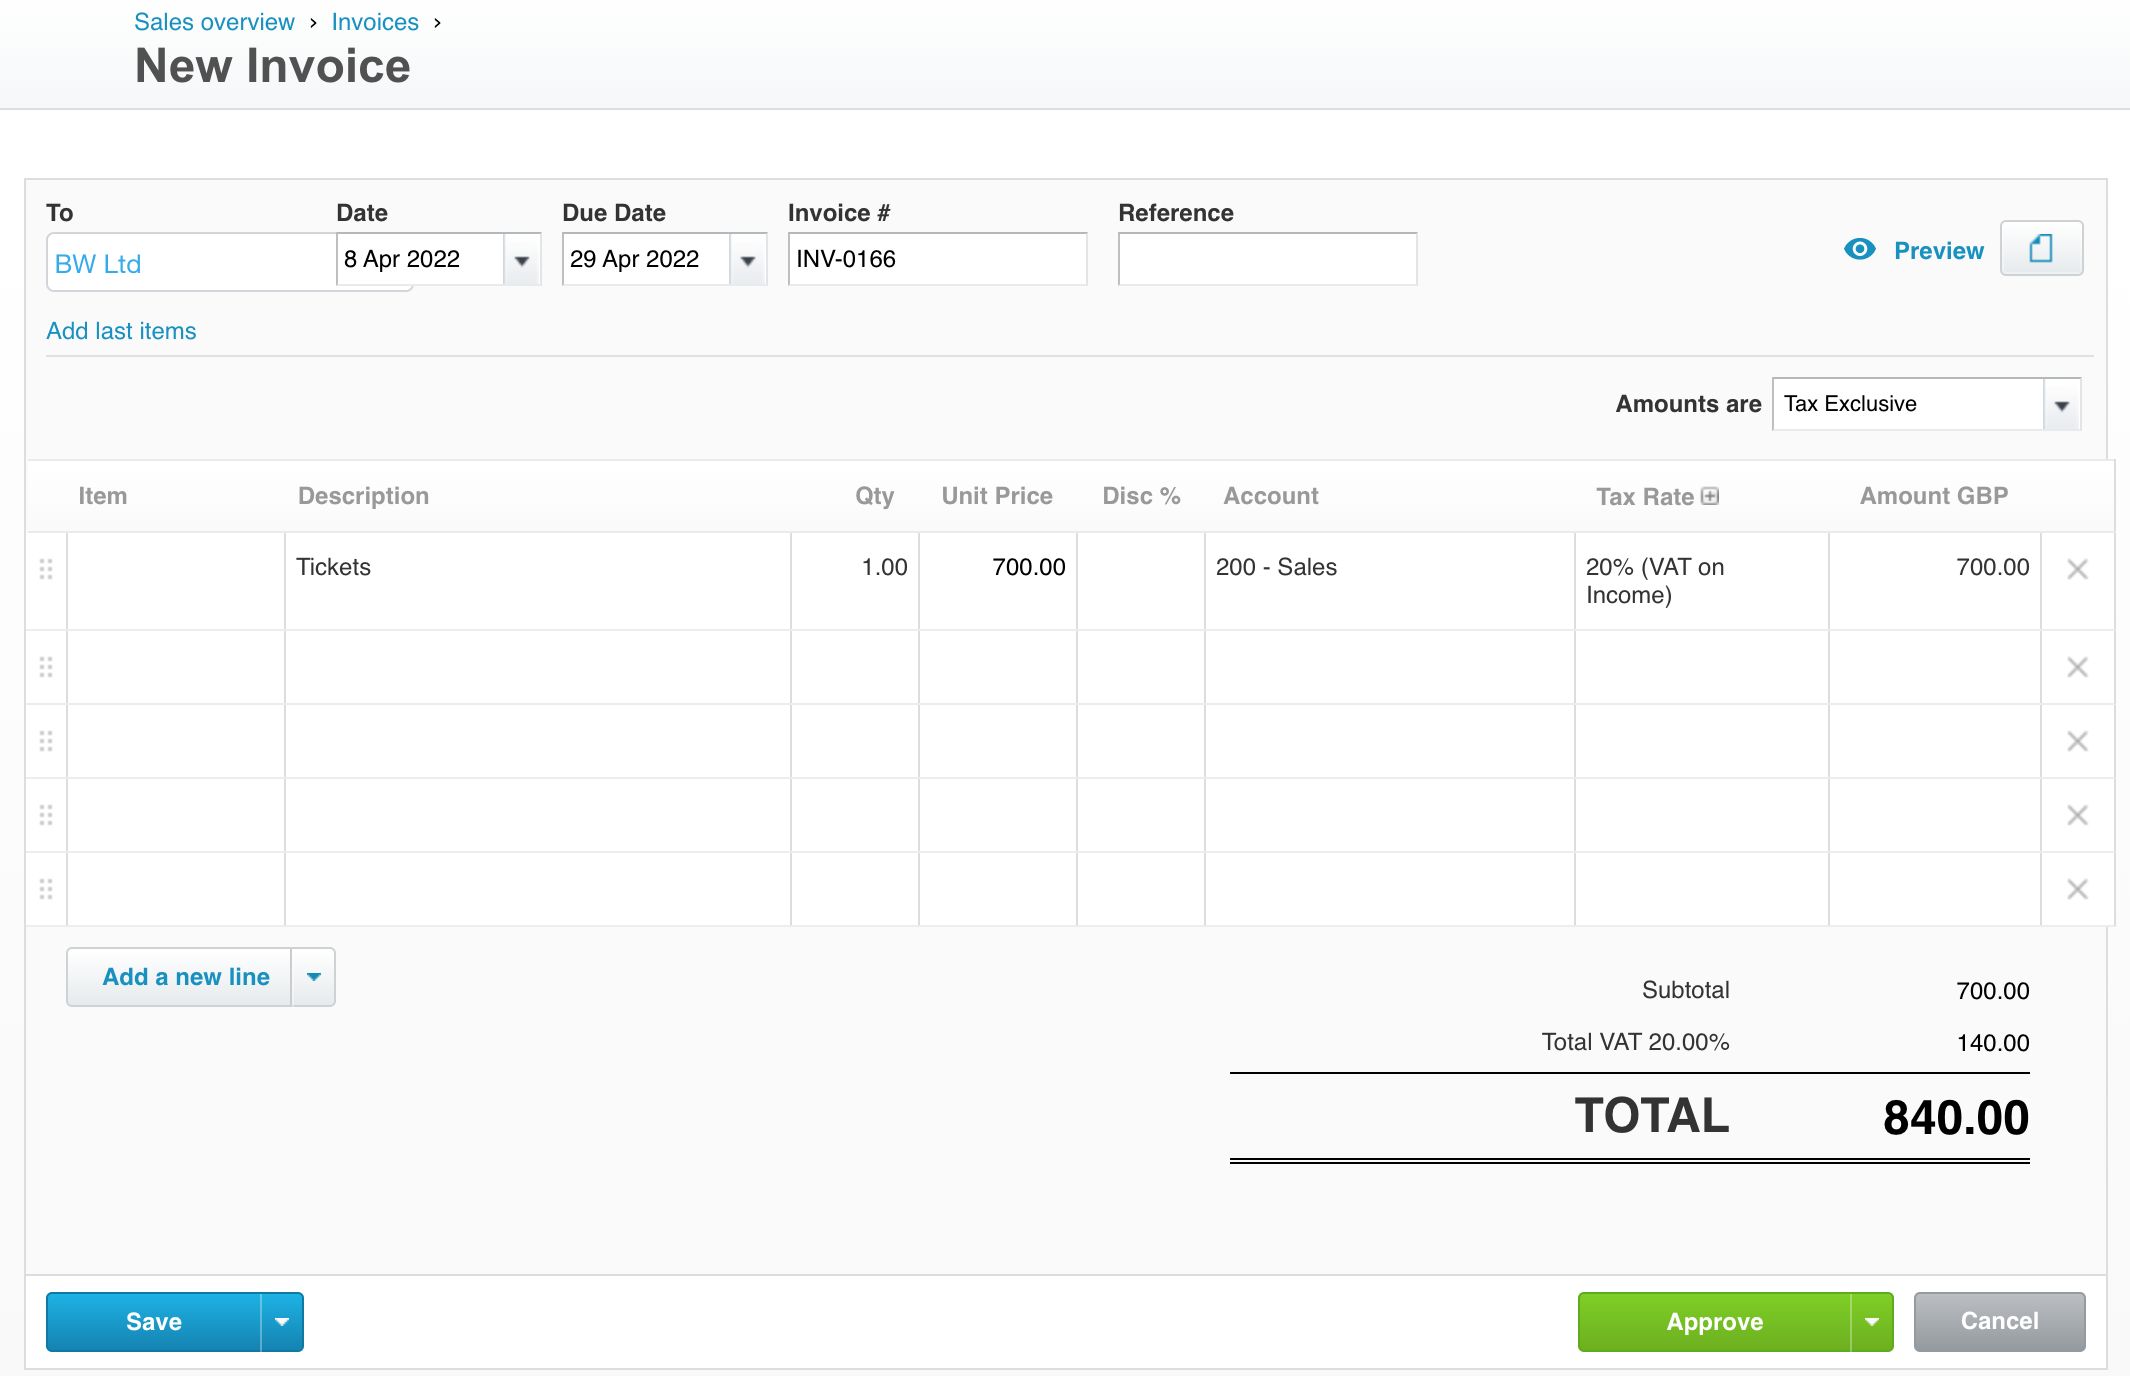
If you create an invoice in Xero’s new format, and click Send, it will also be imported to Converso. Draft invoices however are not imported.
4. Invoice display
It takes upto 20 seconds for Xero invoices to be imported to Converso, and appear in the invoice list.
When the invoice is successfully imported, it will be listed in the the invoice list along with other invoices created directly in Converso:

You can open the invoice by clicking anywhere on the row of the invoice entry.
Once imported, Xero data can not be edited in Converso, however edits made in Xero will be updated in Converso.
5. Invoice data
All the Xero invoice data (business name, contact name, address, item number, description, discount, tax, amount) is included in the Converso invoice format.
Add contact contains Xero details of the contact’s name, business name, billing address and delivery address.
The Xero street address is translated to the Converso delivery address, unless a specific delivery address in Xero is defined. If there is no street address and just a postal address then the postal address is defined as the Converso delivery address.
You also have the option to make the contact’s name and address editable by the contact when they view the invoice. Any changes made are auto saved on the invoice.
Add details includes invoice number created date and due date.
Add product This section contains the product code (or "Item Code" in Xero), quantity, discount, VAT and price imported from Xero.
Create message and link allows you to either create just a payment link, or to send a message via text with a payment link. There is a default message format with placeholders to personalize the message.

Set workflow This section allows you to select an existing workflow, or customize a new workflow, for sending payment reminders and thank you messages.
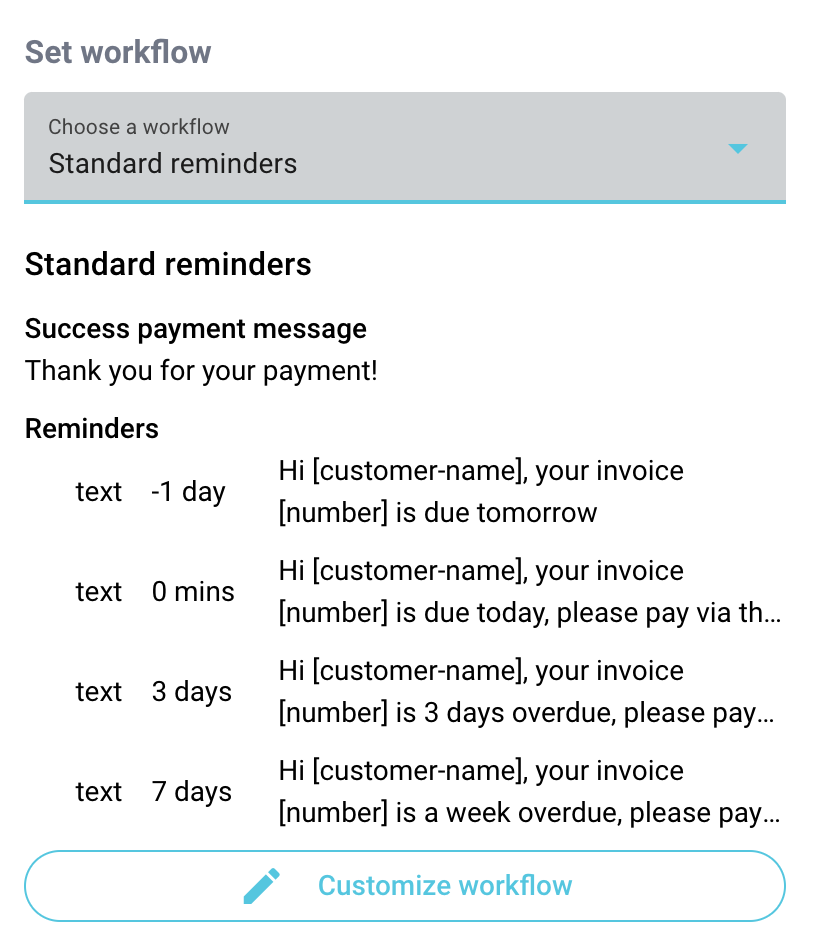
Each reminder sent also includes a payment link.
If an unpaid invoice (eg sent by email from Xero as a past invoice) is imported from Xero, it’s possible to set an overdue reminder. This could be, say, 3 days after the invoice is due. A text reminder with payment link will then be sent automatically on this date.
You can turn off a reminder by clicking on "customize workflow" and deleting the relevant reminder, and then clicking Save. This change will only be saved against the specific invoice.
6. Sending an invoice
You can send the invoice via text at any time, but it is recommended you add a message and a workflow (with any required reminders or thank you messages).
When you click on “Save and Send” the message and invoice link will be sent to the customer, and a unique URL is generated for the payment link.
Once the invoice has been sent, a conversation is created in the conversation panel, with a notification with link to the created invoice, as well as link to the invoice form, together with payment status.
The invoice is also included in the invoice list, and "Last action" status is changed to "Sent" with the name of the user who sent the invoice, and time and date.

The Xero customer name and mobile number is saved in Converso contacts.
In Xero, the invoice is marked as "Sent, Awaiting payment".
You can edit all the data entered in Converso (eg reminders, introductory and thank you messages) after the invoice has been sent, and upto the point of payment.
7. Getting paid
When an invoice is paid, the invoice is automatically updated to "Paid" status in Xero.
When paid by card, the Stripe charge index is attached to the Xero invoice. This makes subsequent reconciliation of invoices and entries on the Stripe bank statement very straightforward, as the Stripe bank entry also contains the charge index, which allows Xero to auto match payment against invoice.
It's also possible to manually update an invoice to paid in both Xero and Converso, and this will update in Converso and Xero respectively.
8. Changes
When a Xero invoice has been imported, it’s not possible for the end customer to edit the Xero data in the invoice ie name and address fields, product description and price.
When a Xero invoice which has been sent but is not paid, is then voided or deleted on Xero, it's also then deleted on Converso.
When a Xero invoice is deleted on Converso, it's not deleted on Xero. A separate action is required in Xero to also delete the invoice on Xero.
9. Data exchange
Data sync between Xero and Converso is two way, and takes place in the following scenarios:
i) When new invoices are created in Xero and are imported to Converso
ii) When historical invoices are imported from Xero to Converso
The data exchange from Xero to Converso contains only invoice data and contact data.
The data exchange from Converso to Xero is restricted to the sent status and payment status of the invoice.
10. Currencies
Converso will import any currency that is selected when creating an invoice in Xero. This currency will then be displayed in the Converso invoice.
If the selected currency is different from the currency of the Stripe bank account imported into Xero, then the exchange rate used by Stripe for the payment will be included in the invoice details.
For instance, if the Stripe bank account in Xero is denominated in GBP, and an invoice is created in Xero in USD, then Converso will present the invoice in USD.
When the customer pays the invoice amount in USD, the exchange rate used by Stripe to convert that payment into GBP will be included in the invoice details in Xero.